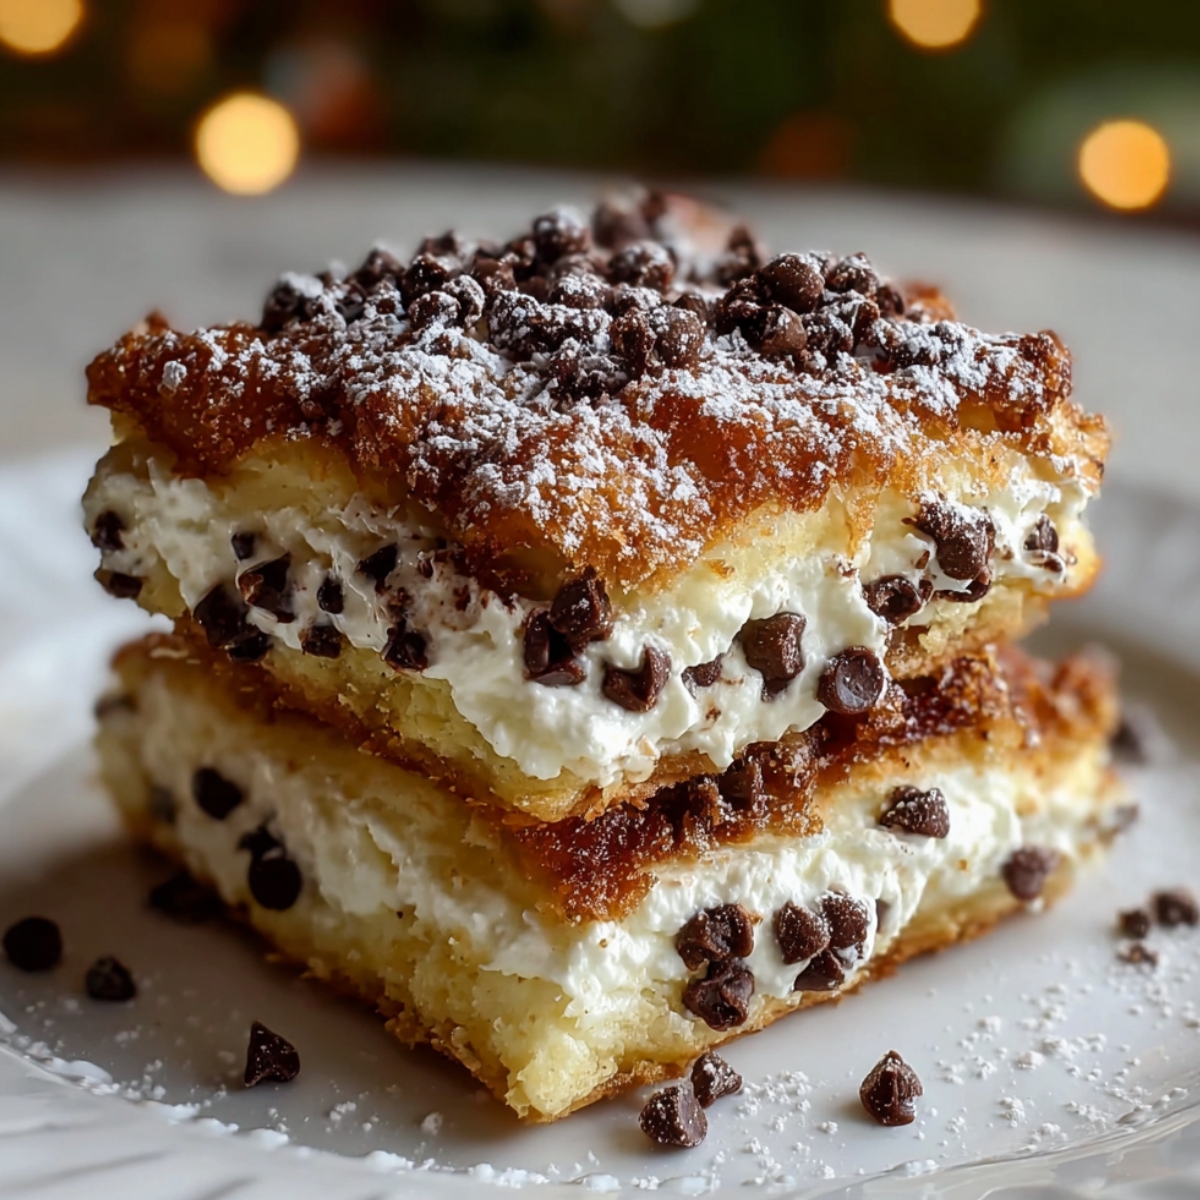
Last Sunday after church, I surprised oliver with these ricotta cannoli squares and watched his face light up when he bit into that creamy ricotta filling studded with mini chocolate chips. He'd been begging to visit the Italian bakery downtown, but between soccer practice and homework, we hadn't made it there in weeks. The cannoli cream filling melted on his tongue just like those fancy bakery treats, but without the messsy shells or the $4-per-cannoli price tag. After 15 years of recreating restaurant favorites and teaching Italian dessert techniques in my cooking workshops.

Beyond Traditional Cannoli Shells
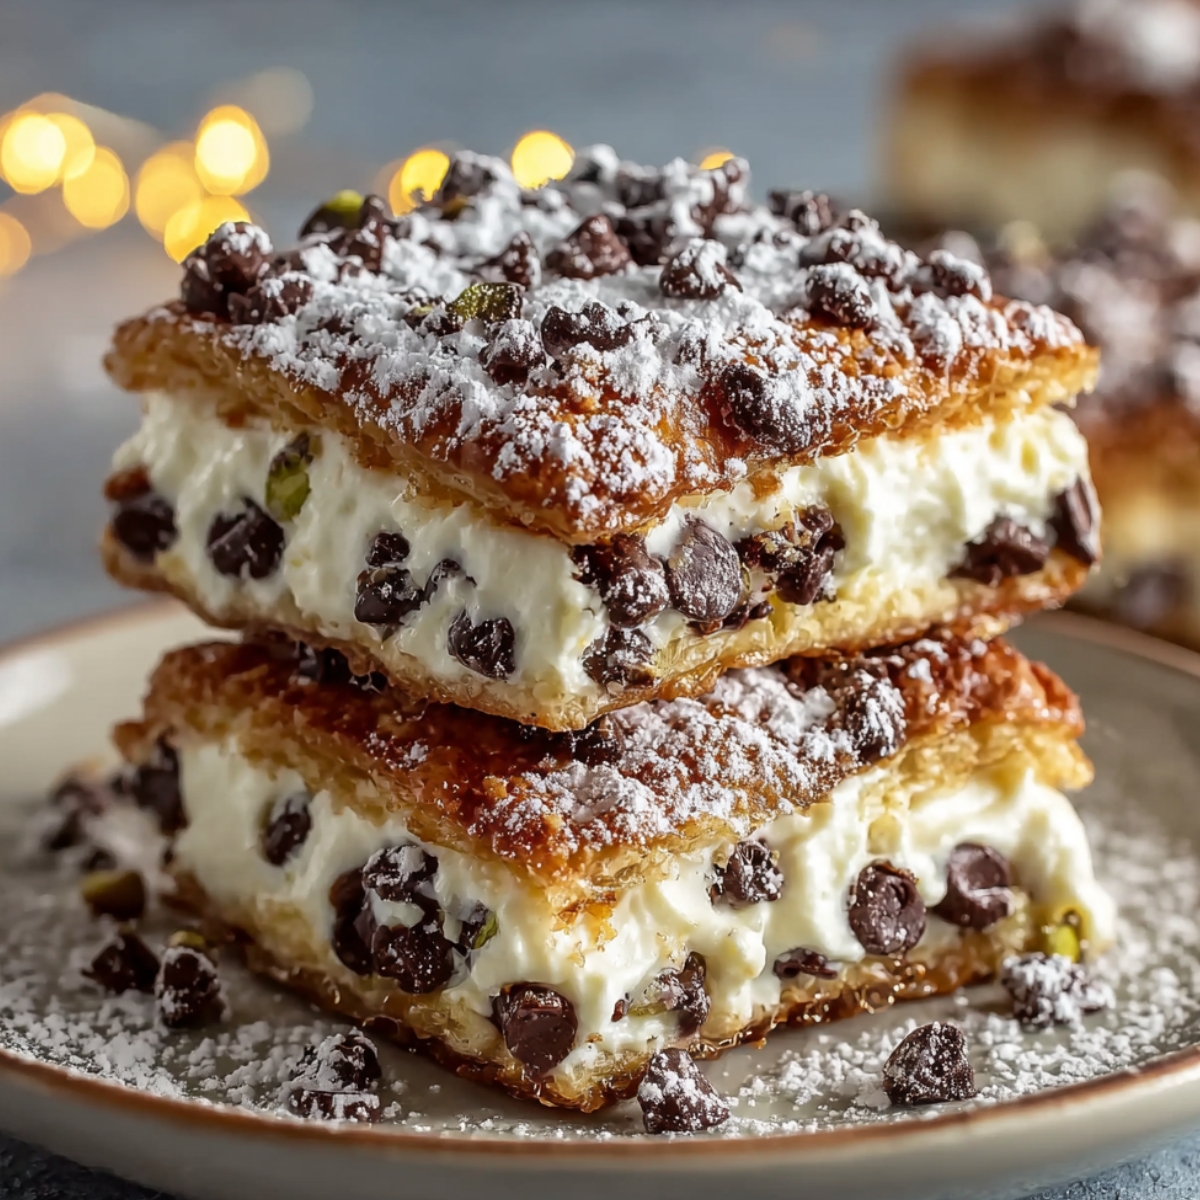
Most cannoli dessert bars require deep-frying shells or complicated pastry work that keeps home bakers from trying them. Through my culinary training and years of perfecting easy dessert bars, I've developed this layered cannoli dessert method that captures every bit of that authentic Italian bakery flavor without the fuss. These creamy Ricotta Cannoli Squares deliver that signature cannoli taste in an elegant, sliceable form perfect for parties or weekend treats.
Why You'll Love These Ricotta Cannoli Squares
These ricotta cannoli squares transformed our dessert routine after one batch convinced oliver that homemade treats beat store-bought every time. The combination of sweet ricotta cream, crunchy pizzelle pieces, and dark chocolate creates those authentic cannoli flavors everyone craves, but in a format that's actually manageable for busy home cooks. What makes this Italian ricotta pastry truly special is how it looks impressive enough for company but comes together with simple assembly - no pastry skills or special equipment required.
The genius lies in using store-bought pizzelle cookies as the crispy "shell" layers, saving you from deep-frying or rolling dough. The ricotta filling stays silky smooth with just the right amount of sweetness, and those mini chocolate chips throughout provide little bursts of richness in every bite. Oliver initially wrinkled his nose at "cheese dessert," but after one taste of this traditional Ricotta Cannoli Squares flavor in square form, he declared it better than the bakery version because "you get more cream and less shell." After years of testing no-bake cannoli bars variations, this version balances texture and flavor perfectly while staying stable enough to slice cleanly for beautiful presentation.
Jump to:
- Beyond Traditional Cannoli Shells
- Why You'll Love These Ricotta Cannoli Squares
- Ricotta Cannoli Squares Ingredients
- How To Make Perfect Ricotta Cannoli Squares
- Ricotta Cannoli Squares Variations
- Substitutions
- Equipment For Ricotta Cannoli Squares
- Storage Tips
- Top Tip
- FAQ
- Your Italian Bakery Treat Awaits!
- Related
- Pairing
- Ricotta Cannoli Squares
Ricotta Cannoli Squares Ingredients
The Creamy Filling:
- 2 pounds whole milk ricotta cheese
- 1 cup powdered sugar
- 1 teaspoon pure vanilla extract
- ½ teaspoon almond extract
- 1 cup heavy whipping cream
- 8 ounces mascarpone cheese
- 1 cup mini chocolate chips
- 2 tablespoons orange zest
The Crunchy Layers:
- 2 packages pizzelle cookies
- ¼ cup melted butter for brushing
- 2 tablespoons granulated sugar mixed with cinnamon
The Finishing Touches:
- Powdered sugar for dusting
- Extra mini chocolate chips
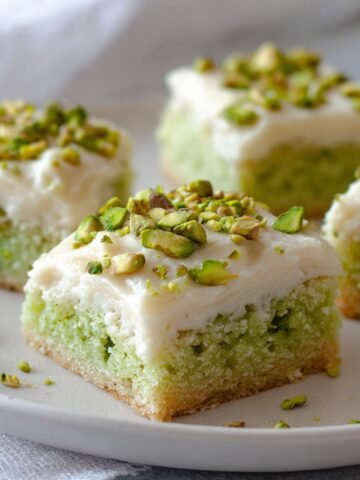
- Chopped pistachios
- Candied orange peel
How To Make Perfect Ricotta Cannoli Squares
Step 1: Drain and Prepare the Ricotta
This step makes or breaks your cannoli cheesecake bars. Line a fine-mesh strainer with cheesecloth or paper towels, dump in your ricotta, and set it over a bowl in the refrigerator. Let it drain for at least 4 hours, preferably overnight - you'll be shocked how much liquid comes out. Properly drained ricotta creates a thick, stable filling that slices beautifully instead of oozing all over your plate. While the ricotta drains, you can prep your other ingredients. This patience pays off with professional-looking Italian dessert squares that hold their shape.
Step 2: Create the Silky Filling
In a large mixing bowl with your electric mixer, beat the drained ricotta with powdered sugar until completely smooth - no grainy texture should remain. Add your mascarpone cheese, vanilla extract, and almond extract, beating until fluffy and well combined. In a separate bowl, whip the heavy cream to stiff peaks, then gently fold it into the ricotta mixture using a spatula. This folding technique keeps the filling light and airy rather than dense. Finally, fold in those mini chocolate chips and orange zest if using. The filling should be thick enough to hold its shape but creamy enough to spread easily.
Step 3: Build the Cookie Base Layer
Line your 9x13 inch baking dish with parchment paper, leaving overhang on the sides for easy removal later. Arrange a single layer of pizzelle cookies on the bottom, breaking pieces as needed to fill gaps - don't worry about perfection here. Brush the cookies lightly with melted butter and sprinkle with a touch of that cinnamon sugar mixture. This buttery layer helps the cookies soften slightly without getting soggy, creating that perfect texture contrast with the creamy ricotta filling. Press everything down gently so it's compact and even.
Step 4: Layer the Cannoli Magic
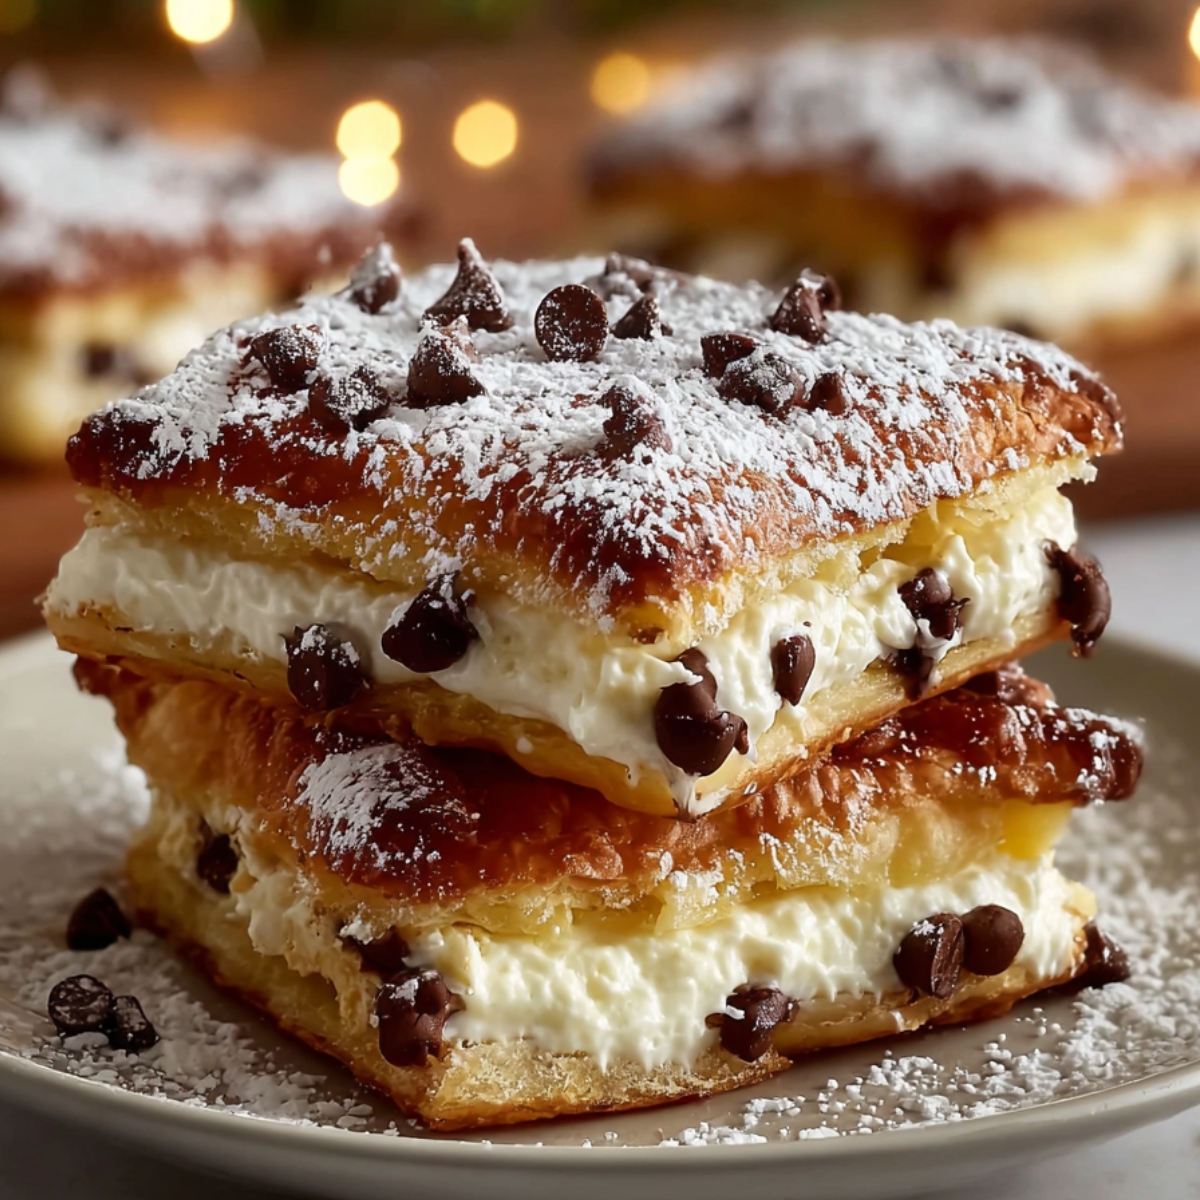
Spread half of your homemade ricotta filling evenly over the cookie base using an offset spatula for smoothness. Add another layer of pizzelle cookies, again filling gaps and creating an even surface. Brush with more melted butter and sprinkle with cinnamon sugar. Top with the remaining ricotta filling, spreading it to the edges and smoothing the top beautifully. This triple-layer construction mimics traditional cannoli with its alternating textures while being much easier to eat and serve than individual filled shells.
Step 5: Chill and Finish
Cover your pan tightly with plastic wrap, pressing it gently against the surface to prevent a skin from forming. Refrigerate for at least 6 hours, but overnight is better - this chilling time is crucial for the layers to meld together and for clean slicing. When ready to serve, use the parchment overhang to lift the entire block out of the pan. Dust generously with powdered sugar, sprinkle with extra mini chocolate chips and chopped pistachios if desired. Cut into squares with a sharp knife, wiping the blade clean between cuts for those bakery-perfect edges.
Ricotta Cannoli Squares Variations
Chocolate Lover's Dream
- Mix 3 tablespoons cocoa powder into the ricotta filling for chocolate base
- Add chopped dark chocolate chunks instead of just chips
- Drizzle melted chocolate over the finished top before serving
- Creates intense chocolate chip ricotta dessert that rivals any bakery
Pistachio Paradise
- Fold ½ cup finely chopped pistachios into the ricotta filling
- Use pistachio paste (2 tablespoons) for authentic Italian flavor
- Garnish top with whole pistachios and gold leaf for elegance
- Brings authentic Sicilian cannoli flavor to these layered treats
Lemon Berry Fresh
- Add 3 tablespoons fresh lemon juice and extra zest to filling
- Layer fresh raspberries between the ricotta and cookie layers
- Top with lemon glaze instead of powdered sugar dusting
- Transforms into bright, summery Italian pastry perfect for warm weather
Espresso Elegance
- Dissolve 2 tablespoons instant espresso in the cream before whipping
- Dust top with cocoa powder mixed with instant espresso
- Add coffee liqueur (2 tablespoons) to the ricotta for adult version
- Creates sophisticated twist on classic Italian sweets
Substitutions
Cheese Variations:
- Whole milk ricotta → Part-skim ricotta (lighter but less creamy)
- Fresh ricotta → High-quality store-bought (ensure it's smooth)
- Mascarpone → Cream cheese (tangier flavor, denser texture)
Cookie Base Options:
- Pizzelle → Graham crackers (easier to find, sweeter)
- Traditional → Vanilla wafers (softer texture)
- Plain pizzelle → Chocolate pizzelle (extra chocolate flavor)
Chocolate Choices:
- Mini chips → Regular chocolate chips chopped small
- Milk chocolate → Dark chocolate (less sweet, more sophisticated)
- Chips → Chopped Ricotta Cannoli Squares shells (ultra-traditional)
Flavoring Alternatives:
- Almond extract → Extra vanilla (if you don't like almond)
- Orange zest → Lemon zest (brighter, lighter flavor)
- Traditional → Add 2 tablespoons rum or Marsala wine
Equipment For Ricotta Cannoli Squares
- 9x13 inch glass baking dish
- Fine-mesh strainer
- Stand or hand mixer
- Offset spatula
- Sharp chef's knife
Storage Tips
Based on professional kitchen experience and Italian bakery traditions:
Best Fresh
- Serve chilled straight from refrigerator for best texture contrast
- Ricotta filling stays creamiest within first 2 days of assembly
- Cookie layers maintain ideal softness without getting soggy
- Fresh assembly ensures that perfect balance of creamy and crunchy
Make Ahead Strategy
- Drain ricotta up to 2 days ahead and keep refrigerated covered
- Make filling completely and refrigerate up to 24 hours before assembly
- Assemble entire dessert up to 2 days before serving for convenience
- Everything tastes even better after overnight rest as flavors meld
Storage Instructions
- Cover tightly with plastic wrap and refrigerate for up to 4 days
- Keep chilled at all times to maintain food safety and texture
- Do not freeze as ricotta separates and becomes grainy when thawed
- Dust with fresh powdered sugar just before serving each day
Top Tip
- Drain That Ricotta Seriously The single biggest mistake with this Ricotta Cannoli Squares dessert bars recipe is skipping or rushing the ricotta draining. I cannot stress this enough - watery ricotta creates a weepy mess that never sets up properly. Set up your strainer the night before, let gravity do its work, and you'll remove at least ½ cup of liquid. That moisture would otherwise prevent your Ricotta Cannoli Squares from slicing cleanly and make the cookie layers soggy instead of pleasantly softened.This one step separates homemade attempts from bakery-quality results.
- Temperature Matters for Assembly Work with cold ingredients straight from the refrigerator when assembling your layered cannoli dessert. Room temperature ricotta filling is too soft to spread in neat layers and will ooze between the cookie pieces instead of staying put. Cold mascarpone and whipped cream maintain their structure better during folding and spreading. Keep your workspace cool too - on hot summer days, I sometimes chill my mixing bowl in the freezer for 10 minutes before starting.
- Patience with Chilling Pays Off Six hours minimum in the refrigerator isn't a suggestion - it's essential for these Italian-inspired recipes. The cookies need time to absorb moisture from the filling and soften to the perfect texture, while the ricotta cream needs to firm up for clean slicing. Cutting too early means filling that squishes out the sides and cookies that are either too hard or falling apart.
FAQ
Do I need to drain the ricotta cheese?
Absolutely yes! Draining ricotta is essential for ricotta cannoli squares success. From years of testing this Italian ricotta pastry, undrained ricotta contains too much liquid, creating weepy filling that won't set properly. Place ricotta in a cheesecloth-lined strainer over a bowl and refrigerate 4-6 hours minimum. You'll remove at least ½ cup liquid for perfect, sliceable texture.
What kind of ricotta cheese should I use?
Whole milk ricotta creates the creamiest cannoli filling with authentic Italian bakery flavor. Based on my culinary training, avoid part-skim ricotta which lacks richness, and skip "ricotta impastata" which is too dry. Look for fresh ricotta from the deli section rather than shelf-stable tubs. High-quality ricotta makes noticeable difference in these creamy Ricotta Cannoli Squares.
When should I assemble the cannoli squares?
Assemble these layered dessert Ricotta Cannoli Squares at least 6 hours before serving, though overnight is ideal. From professional baking experience, the chilling time allows cookie layers to soften perfectly while ricotta filling firms up for clean slicing. Plan to make these cannoli dessert bars the night before your event for best texture and easiest cutting.
Can I make the filling ahead of time?
Yes, prepare the ricotta filling up to 24 hours ahead and refrigerate in an airtight container. Based on years of recipe testing, make sure ricotta is properly drained first. The filling stays fresh and maintains its smooth texture when chilled. Just give it a gentle stir before assembling to ensure chocolate chips are evenly distributed throughout.
Your Italian Bakery Treat Awaits!
You now have my professional techniques for creating authentic ricotta cannoli squares that rival any Italian bakery. These easy dessert bars prove that impressive treats don't require complicated techniques or hard-to-find ingredients - just smart assembly and quality ricotta.
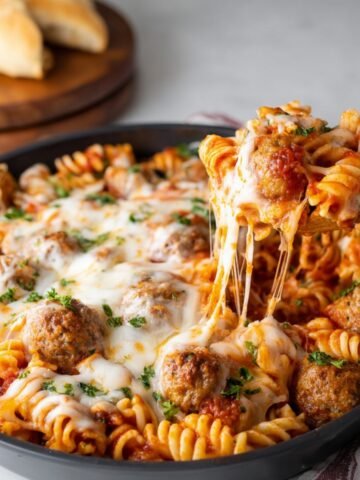
Craving more homemade favorites? Balance out the sweetness with our Healthy Orzo Vegetable Soup Recipe that's packed with fresh vegetables and comforting flavors. Need a complete dinner solution? Our Garlic Parmesan Chicken and Potatoes delivers restaurant-quality results in one pan. Looking for another Southern classic? Try our Buttermilk Pie: Southern Comfort in Every Slice for creamy, tangy perfection that disappears fast!
Share your Ricotta Cannoli Squares success! Tag @SarahAndoliverKitchen and #Ricotta Cannoli Squares. We celebrate every homemade bakery creation!
⭐⭐⭐⭐⭐ Rate this Ricotta Cannoli Squares and join our dessert community!
Related
Looking for other recipes like this? Try these:


Pairing
These are my favorite dishes to serve with Ricotta Cannoli Squares


Ricotta Cannoli Squares
Equipment
- 1 9x13 inch baking dish (Glass preferred)
- 1 Fine-mesh strainer (For draining ricotta)
- 1 Cheesecloth or paper towels (To line strainer)
- 1 Stand mixer or hand mixer (For whipping and mixing)
- 1 Offset spatula (For smooth layering)
- 1 Sharp knife (For clean slicing)
- 1 Mixing bowls (Multiple)
Ingredients
Creamy Filling
- 2 pounds Whole milk ricotta cheese - Drain 4-12 hours
- 1 cup Powdered sugar
- 1 teaspoon Vanilla extract
- ½ teaspoon Almond extract - Optional
- 1 cup Heavy whipping cream - Whipped to stiff peaks
- 8 ounces Mascarpone cheese - Softened
- 1 cup Mini chocolate chips
- 2 tablespoons Orange zest - Optional but traditional
Crunchy Layers
- 2 packages Pizzelle cookies - Vanilla or chocolate
- ¼ cup Melted butter - For brushing
- 2 tablespoons Granulated sugar - Mixed with cinnamon
- Cinnamon - To taste
Finishing Touches
- Powdered sugar - For dusting
- Mini chocolate chips - Garnish
- Chopped pistachios - Optional
- Candied orange peel - Optional
Instructions
- Line a strainer with cheesecloth or paper towels. Add ricotta and place over a bowl. Refrigerate and drain for at least 4 hours or overnight until excess liquid is removed.
- Beat drained ricotta with powdered sugar until smooth. Add mascarpone, vanilla, and almond extract. In a separate bowl, whip heavy cream to stiff peaks. Gently fold the whipped cream into the ricotta mixture. Fold in mini chocolate chips and orange zest.
- Line a 9×13 pan with parchment and arrange a single layer of pizzelle cookies. Brush lightly with melted butter and sprinkle with cinnamon sugar.
- Spread half of the ricotta filling over the cookies. Add a second cookie layer, brush with butter, sprinkle cinnamon sugar, and top with remaining filling. Smooth the surface.
- Cover tightly with plastic wrap and refrigerate 6 hours or overnight. Lift out using parchment, dust with powdered sugar, and garnish with chocolate chips or pistachios. Slice into squares with a clean sharp knife.
Leave a Reply