Last Tuesday, Oliver burst through the kitchen door after school absolutely raving about something called cheesy pizza pockets that his friend Emma brought for lunch. "Mom, they're like tiny pizzas you can hold in your hand!" he explained, eyes wide with excitement. After watching him try to make them with leftover pizza slices stuffed into sandwich bread (what a mess!), I knew I had to figure this out. What started as making a seven-year-old happy became our most-requested after-school snack that even the pickiest neighborhood kids gobble up.

Why You'll Love This Cheesy Pizza Pockets
Making these cheesy pizza pockets has become our Thursday tradition after I pick Oliver up from soccer practice. They're everything a busy parent needs - quick enough for hangry kids, filling enough that they actually stay satisfied, and easy to customize for even the pickiest eaters. Plus, watching Oliver's face light up when he bites into that gooey cheese reminds me why I love cooking with him. There's something special about seeing his little hands carefully helping me seal the edges, even if half of them end up looking wonky. He's gotten so good at it that he now teaches his friends when they come over for playdates.
These aren't just snacks; they're little pockets of happiness that happen to be really practical for meal prep, lunchboxes, or those "what's for dinner" moments when you're completely out of ideas and need something fast. The best part? You can make a big batch on Sunday and have grab-and-go meals all week long. I've sent these to school with Oliver countless times, and his teacher always mentions how the other kids gather around wanting to trade their lunches. They're also great for busy weeknight dinners when everyone's rushing off to different activities. Just pop them in the oven while you're helping with homework, and dinner's ready in 15 minutes.
Jump to:
- Why You'll Love This Cheesy Pizza Pockets
- Ingredients For Cheesy Pizza Pockets
- How To Make Cheesy Pizza Pockets Step By Step
- Equipment For Cheesy Pizza Pockets
- StorageTips
- Substitutions
- Creative Pizza Pocket Variations
- Top Tip
- Why This Cheesy Pizza Pockets Works
- FAQ
- Time for Pizza Pocket Perfection!
- Related
- Pairing
- Cheesy Pizza Pockets
Ingredients For Cheesy Pizza Pockets
The Foundation:
- Pizza dough
- Mozzarella cheese
- Pizza sauce
- Pepperoni slices
- Italian seasoning
- Garlic powder
- Olive oil
- Egg
Optional Fillings:
- Cooked sausage
- Bell peppers
- Mushrooms
- Black olives
- Parmesan cheese
See recipe card for quantities.

How To Make Cheesy Pizza Pockets Step By Step
Prep Your Station:
- Preheat oven to 425°F
- Line baking sheet with parchment
- Let dough come to room temperature
- Prep all fillings in small bowls
Shape and Fill:
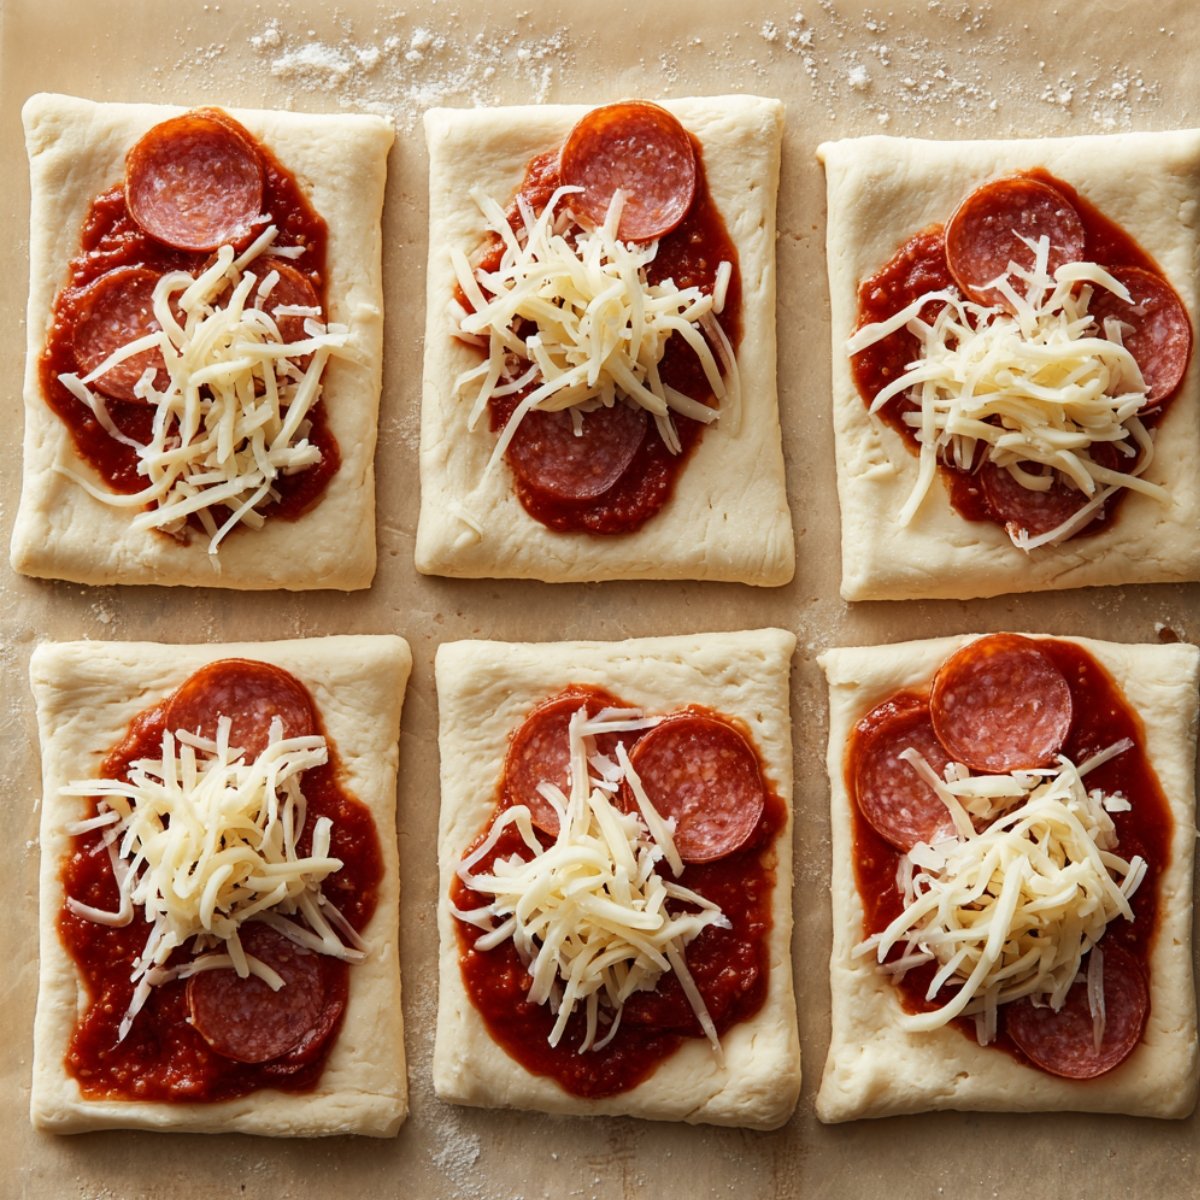
- Divide dough into 8 equal pieces
- Roll each into 5-inch circles
- Spread thin layer of sauce on half
- Add cheese and toppings sparingly
- Leave ½-inch border around edges
Seal the Deal:

- Fold dough over filling
- Press edges firmly with fork
- Brush tops with beaten egg
- Cut small vents with knife tip
Into the Oven:
- Bake 12-15 minutes
- Look for golden-brown tops
- Let cool 5 minutes before eating
- Serve with extra sauce for dipping
Equipment For Cheesy Pizza Pockets
- Large baking sheet
- Rolling pin
- Fork for sealing
- Pastry brush
- Sharp knife
StorageTips
Based on countless batch preparations for Oliver's lunch box, here's what works:
Immediate Serving (Best Option):
- Cool 5 minutes after baking
- Serve warm with dipping sauce
- Enjoy that perfect cheese stretch
Short-term Storage (2-3 days):
- Cool completely
- Store in airtight container
- Reheat in toaster oven at 350°F
Freezer Magic (1-2 months):
- Cool completely before freezing
- Wrap individually in foil
- Freeze on baking sheet first
- Transfer to freezer bags
Reheating from Frozen:
- Oven: 375°F for 15-18 minutes
- Air fryer: 350°F for 8-10 minutes
- Microwave: Not recommended (soggy results)
Substitutions
From feeding various dietary needs in our neighborhood, these substitutions work beautifully:
Dough Options:
- Pizza dough → Puff pastry sheets
- Regular → Whole wheat dough
- Traditional → Gluten-free dough
Cheese Switches:
- Mozzarella → Cheddar blend
- Dairy → Vegan cheese
- Regular → Low-fat options
Protein Swaps:
- Pepperoni → Turkey pepperoni
- Meat → Vegetarian options
- Traditional → Cooked chicken
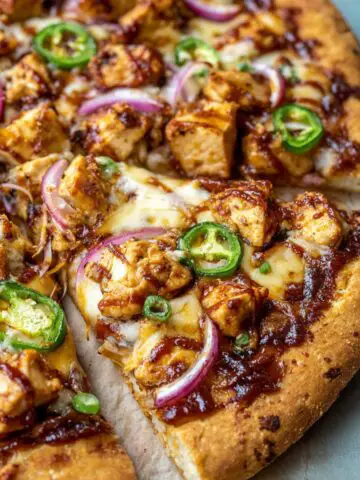
Creative Pizza Pocket Variations
Breakfast Style:
- Scrambled eggs
- Breakfast sausage
- Cheddar cheese
- Hash browns
Veggie Delight:
- Roasted vegetables
- Spinach
- Feta cheese
- Sun-dried tomatoes
BBQ Chicken:
- Cooked chicken
- BBQ sauce
- Red onions
- Smoked cheese
Dessert Surprise:
- Nutella
- Sliced bananas
- Mini marshmallows
- Powdered sugar dusting

Top Tip
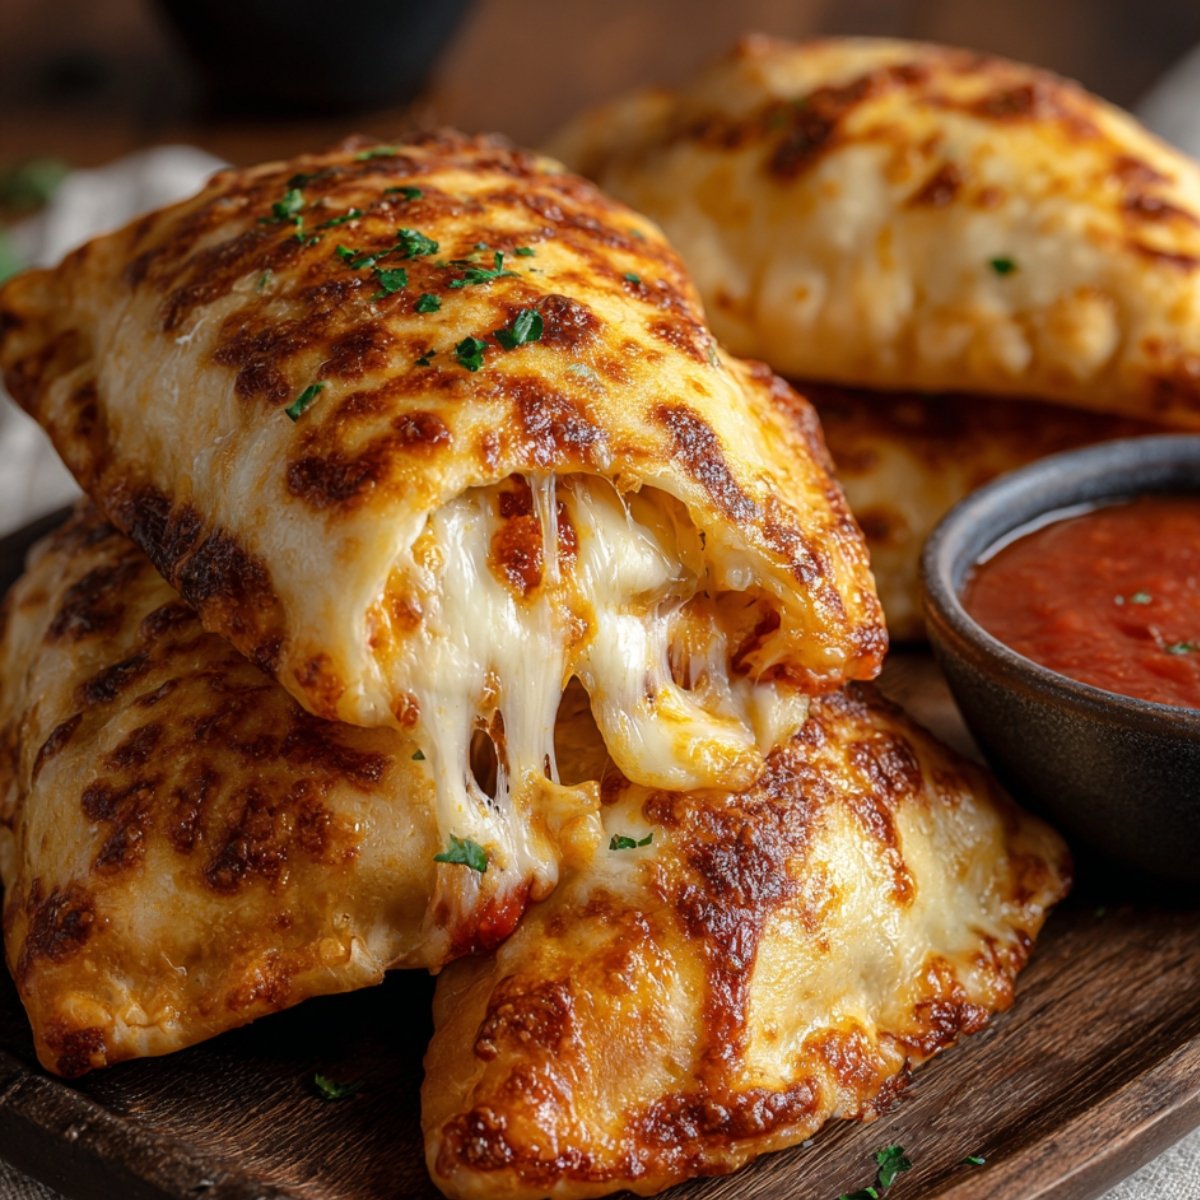
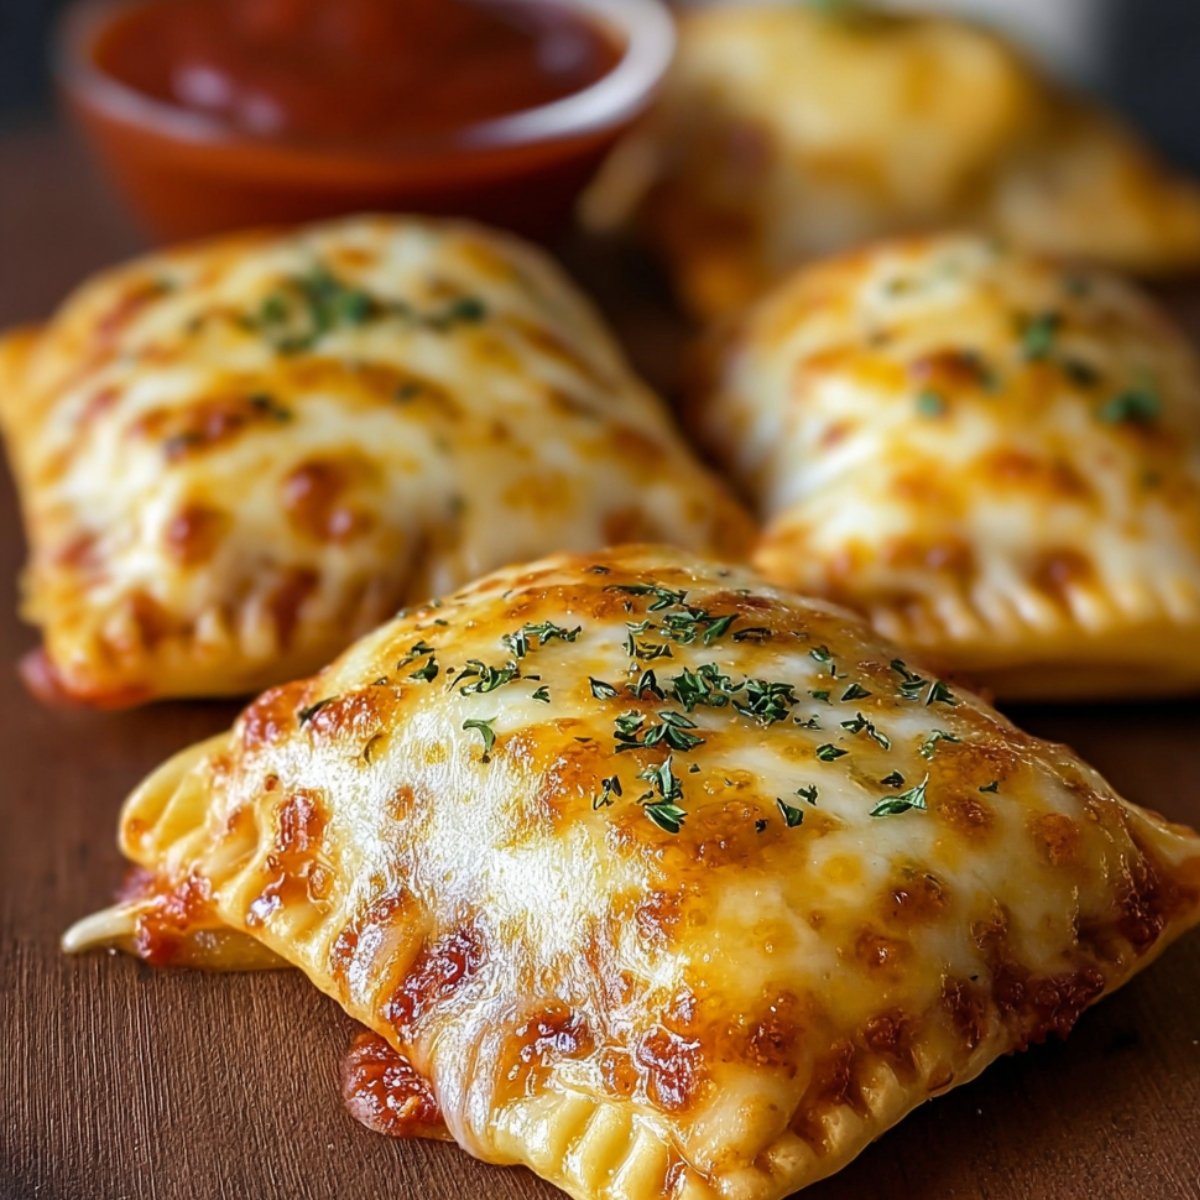
- Based on countless batch preparations for Oliver's lunch box, here's what works best. The immediate serving option is always my favorite - cool them for just 5 minutes after baking, then serve warm with dipping sauce so you can enjoy that cheese stretch. There's nothing quite like biting into a fresh-from-the-oven Cheesy Pizza Pockets when the cheese is still gooey and the crust is crispy.
- For short-term storage up to 2-3 days, let them cool completely before storing in an airtight container. When you're ready to eat them again, reheat in a toaster oven at 350°F to get that crispiness back. Don't use the microwave unless you're desperate - it makes them soggy and chewy instead of crispy.
- The freezer option is my secret for busy weeks. These freeze well for 1-2 months when you cool them completely, wrap individually in foil, and freeze on a baking sheet first before transferring to freezer bags. But here's my favorite trick - you can also freeze them unbaked. Just assemble them completely, freeze on trays, then bake straight from frozen adding 3-4 extra minutes.
Why This Cheesy Pizza Pockets Works
After years of testing different approaches to making cheesy pizza pockets, I've learned exactly what makes them turn out right every time. The key is getting the dough-to-filling ratio just right - too much filling and they burst open in the oven, too little and you're basically eating bread. I've also figured out that letting the dough come to room temperature before rolling makes all the difference in how easy it is to work with and how well it seals. The temperature is crucial too. Baking at 425°F gives you that golden, crispy outside while making sure the cheese melts completely inside. I tried lower temperatures thinking it would be gentler, but the dough just stayed pale and chewy.
What really makes this Cheesy Pizza Pockets work is the egg wash on top and the fork-pressed edges. The egg wash gives that beautiful golden color and helps the crust get crispy, while pressing with a fork creates a seal that actually holds during baking. I learned this the hard way after cleaning cheese off my oven floor more times than I care to admit. It took me about twelve tries to get this right, with Oliver as my very honest taste tester telling me when something wasn't quite there yet. Now when I make these, they come out looking like something from a pizza shop, and Oliver gets so excited he calls his friends to come try them.
FAQ
What cheese is in pizza pockets?
Mozzarella is the classic choice for that cheese stretch, but cheddar, provolone, or cheese blends work great too. For best results, use block cheese and shred it yourself - pre-shredded cheese has anti-caking agents that prevent smooth melting in these gooey cheese filling pockets.
What's the best way to cook pizza pockets?
Oven baking at 425°F gives the crispiest crust and most even cooking. Air fryer Cheesy Pizza Pockets work great too at 375°F for 8-10 minutes. Avoid microwaving if possible - it makes the crust chewy instead of crispy and can create hot spots in the filling.
How long do you leave pizza pockets in the oven?
Bake these for 12-15 minutes at 425°F until golden brown. Frozen ones need 15-18 minutes. Watch for the cheese bubbling slightly through any small openings - that's your signal they're done and the filling is hot throughout.
Are pizza pockets discontinued?
Commercial frozen Cheesy Pizza Pockets come and go from store shelves, but homemade versions are always available in your kitchen! Making them from scratch gives you complete control over ingredients and flavors, plus they taste way better than any frozen pizza pockets you'll find in stores.
Time for Pizza Pocket Perfection!
Now you have all the secrets to creating cheesy pizza pockets that blow the frozen versions out of the water. From proper filling ratios to that egg wash trick, these little packets of joy will become your new go-to snack solution. Oliver and I have made these so many times that he can practically make them with his eyes closed, and watching him teach his friends the folding technique never gets old. There's something really special about seeing kids get excited about cooking, especially when they realize they can make something this delicious with their own hands.
Craving more kid-approved favorites that bring families together? Try our Best Fried Green Tomatoes Recipe that even picky eaters love - Oliver was shocked that he actually liked a green vegetable! Our Easy Raspberry Lemon Cupcakes Recipe is great for birthday parties and school celebrations, and the kids love helping measure and mix. Or fire up the grill for our Easy Crack Burgers Recipe that disappears faster than we can make them - seriously, I've never seen burgers vanish so quickly at a family barbecue.
Share your Cheesy Pizza Pockets creations! We love seeing your family's favorite flavor combinations, and Oliver gets so excited when other kids post pictures of their attempts. There's nothing like seeing a seven-year-old's face light up when they realize other families are making "his" recipe too.
⭐️⭐️⭐️⭐️⭐️ Rate this Cheesy Pizza Pockets and join our snack-loving community! We're always sharing new ideas and answering questions from other parents trying to get their kids excited about cooking.
Related
Looking for other recipes like this? Try these:

Pairing
These are my favorite dishes to serve with Cheesy Pizza Pockets


Cheesy Pizza Pockets
Equipment
- 1 Baking sheet (Lined with parchment paper)
- 1 Rolling pin (For flattening dough)
- 1 Fork (To seal edges)
- 1 Pastry brush (For egg wash)
- 1 Sharp knife (To cut vents in dough)
Ingredients
- 1 lb Pizza dough - Let come to room temp
- 1 cup Mozzarella cheese - Shredded (block cheese melts best)
- ½ cup Pizza sauce - Or more, as needed
- ½ cup Pepperoni slices - Optional
- 1 teaspoon Italian seasoning
- ½ teaspoon Garlic powder
- 1 tablespoon Olive oil
- 1 Egg - Beaten for egg wash
Instructions
- Preheat oven to 425°F (220°C). Line a large baking sheet with parchment paper. Let your pizza dough come to room temperature. Place all fillings in small bowls for easy access.
- Divide dough into 8 equal pieces. Roll each into a 5-inch circle. Spread a thin layer of pizza sauce on one half of each circle. Add a small amount of cheese and desired toppings, leaving a ½-inch border.
- Fold the dough over the filling to form a half-moon. Use a fork to firmly press and seal the edges. Brush tops with beaten egg. Cut small vents on top with the knife tip.
- Bake for 12-15 minutes until golden brown. Let cool for 5 minutes before serving. Serve with extra pizza sauce for dipping.

Leave a Reply