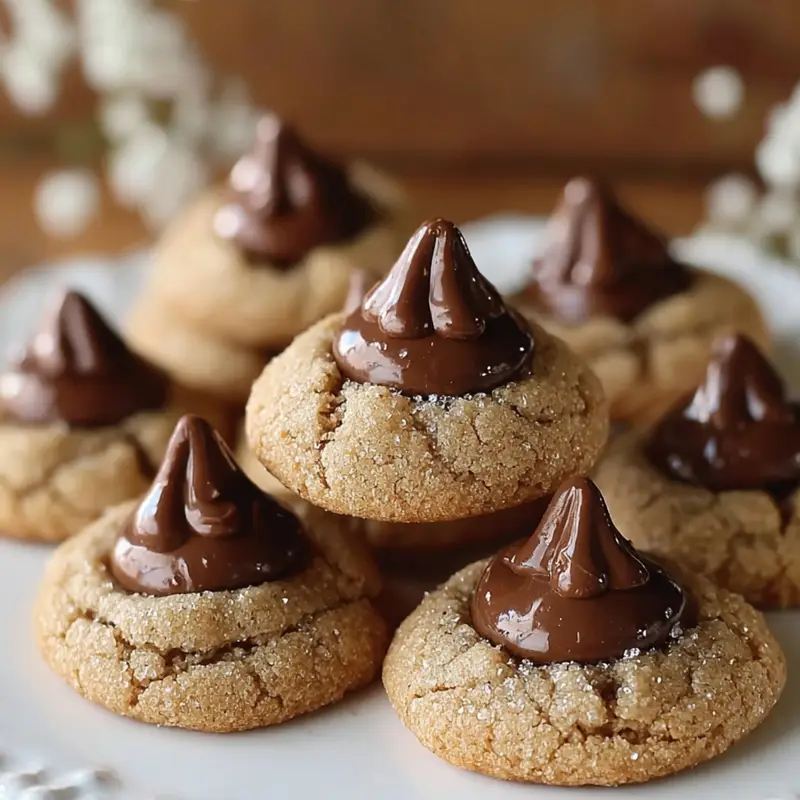
Last December, oliver came home from his friend's house asking why we never make "those peanut butter cookies with the chocolate hats." Turns out, he'd discovered Hershey kiss cookies at a holiday party and couldn't stop talking about them. I'd always thought these peanut butter blossom cookies were too simple to be special, but after watching oliver's face light up with each bite, I realized simple is exactly what makes them perfect. The combination of soft peanut butter cookie base and that iconic chocolate kiss pressed on top creates something nostalgic and comforting that spans generations.
Why You'll Love This Hershey Kiss Cookies
These Hershey Kiss Cookies have become our most-requested treat for school events and family gatherings. The dough comes together in one bowl with ingredients you probably already have, and rolling them in sugar takes less time than oliver's homework complaints. What really sells this recipe is how foolproof it is - even on my most distracted baking days, these turn out perfectly golden with those signature crackled tops. No fancy equipment needed, no complicated steps to memorize, just straightforward mixing and baking that works every single time.
These Hershey Kiss Cookies recipe makes enough to share and still have plenty left for sneaking with afternoon coffee. oliver has perfected the art of eating them by nibbling around the chocolate kiss first, then savoring the peanut butter base. Watching him develop his own cookie-eating ritual reminds me why these simple treats matter so much. They're not just cookies - they're little traditions in the making that bring everyone together around the kitchen counter.
Jump to:
Hershey Kiss Cookies Ingredients
Cookie Dough:
- 1 ¾ cups all-purpose flour
- 1 teaspoon baking soda
- ½ teaspoon salt
- ½ cup unsalted butter, softened
- ½ cup creamy peanut butter
- ½ cup granulated sugar
- ½ cup packed light brown sugar
- 1 large egg
- 2 tablespoons milk
- 1 teaspoon vanilla extract
For Rolling:
- ⅓ cup granulated sugar
For Topping:
- 48 Hershey's Kisses, unwrapped
How To Make Hershey Kiss Cookies
Step 1: Mix the Dough
Start by whisking together your flour, baking soda, and salt in a medium bowl - set that aside. In your large mixing bowl, beat the softened butter with both the peanut butter and sugars until the mixture looks light and fluffy, about 3 minutes with an electric mixer. This creaming step is crucial for getting those beautiful crackled tops. Add your egg, milk, and vanilla, beating until everything's well combined. Gradually mix in your flour mixture on low speed until just combined. Don't overmix or your cookies will be tough instead of tender.
Step 2: Shape and Roll
Scoop the dough into balls about 1 tablespoon each - a cookie scoop makes this super easy and keeps them uniform. Roll each ball between your palms to make them smooth and round. Pour your rolling sugar into a small bowl and roll each dough ball generously in the sugar until completely coated. The sugar coating creates that signature sparkly exterior and helps form those pretty cracks as the cookies bake.
Step 3: Bake to Perfection
Place your sugar-coated dough balls on parchment-lined baking sheets, spacing them about 2 inches apart. Bake at 375°F for 8-10 minutes - you want them set around the edges but still soft in the center. They'll look slightly underdone, and that's perfect. The cookies will continue cooking on the hot pan after you remove them from the oven, so don't be tempted to overbake.
Step 4: Add the Kisses
This is the fun part that oliver always wants to help with. As soon as the cookies come out of the oven, immediately press an unwrapped Hershey's Kiss firmly into the center of each cookie. The cookie will crack around the edges - this is exactly what you want. Press down until the bottom of the Kiss is flush with the cookie top. Work quickly while the cookies are still hot and soft.
Step 5: Cool Completely
Let the cookies cool on the baking sheet for about 5 minutes, then carefully transfer them to a wire rack. The chocolate needs time to set back up, so resist the urge to eat them right away. I know it's hard - oliver tests my willpower every single time. After about 30 minutes, the kisses will be perfectly set and the cookies will have reached their ideal chewy texture.
Storing Your Kiss Cookies
Best Fresh
- Serve cookies after chocolate fully sets (about 30 minutes)
- The peanut butter stays soft and chewy when fresh
- Chocolate Kiss maintains perfect shape when recently baked
- First 24 hours deliver absolute best texture
Room Temperature Storage
- Store in airtight container for up to 5 days
- Place parchment between layers to prevent sticking
- Keep away from direct sunlight and heat
- Cookies stay soft if container seals well
Freezing Instructions
- Freeze baked cookies up to 3 months in freezer bags
- Place parchment between layers before freezing
- Thaw at room temperature for 1 hour before serving
- Chocolate may "bloom" slightly but taste stays perfect
Make-Ahead Strategy
- Freeze cookie dough balls without sugar coating for 3 months
- Roll frozen dough in sugar and bake directly from freezer
- Add 1-2 extra minutes to baking time when frozen
- Perfect for having fresh cookies anytime
Hershey Kiss Cookies Variations
3-Ingredient Version
- Mix 1 cup peanut butter with 1 cup sugar
- Add 1 egg and stir until combined
- Roll in sugar and bake as directed
- Press Kisses while hot for easy cookies
- Perfect when you're short on ingredients
- Still delivers that classic flavor combination
Cookies and Cream Style
- Add ½ cup crushed Oreos to dough
- Use white chocolate Kisses on top
- Roll in crushed Oreo crumbs instead of sugar
- Creates cookies and cream flavor profile
- oliver's friends go crazy for these
- Different twist on the classic recipe
Shortbread Version
- Replace peanut butter with additional butter
- Reduce sugar to ¾ cup total
- Add ½ teaspoon almond extract
- Creates buttery shortbread base
- More delicate and crumbly texture
- Perfect for tea time or elegant occasions
Thumbprint Style
- Make deeper indent before baking
- Fill with jam or caramel after baking
- Press Kiss into center of filling
- Creates beautiful layered effect
- Great for special occasions
- Extra flavor dimension with fruit or caramel
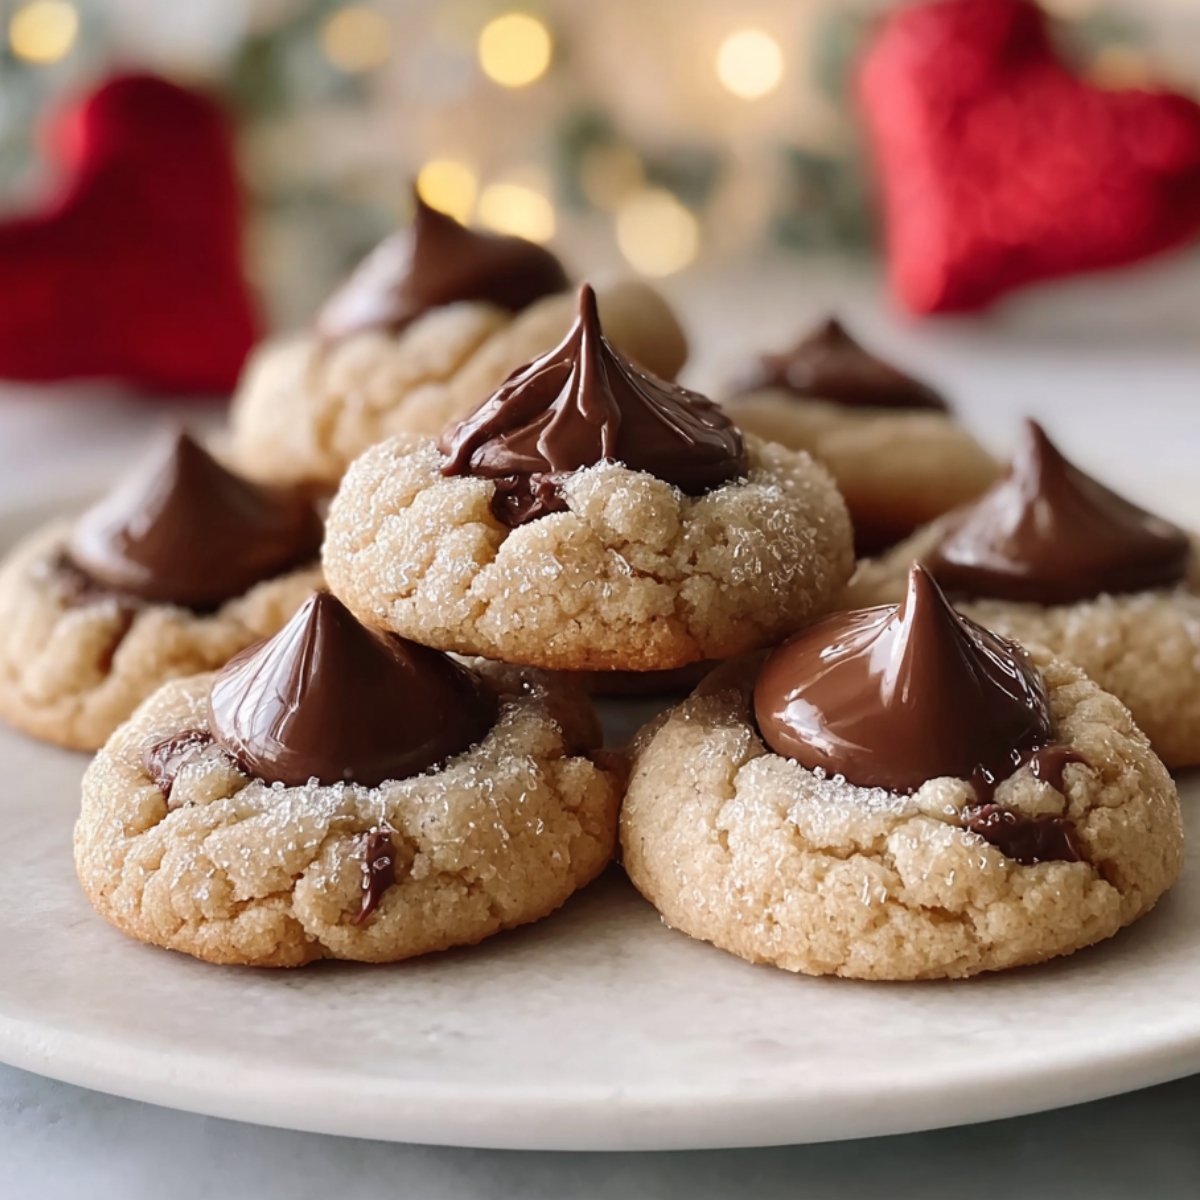
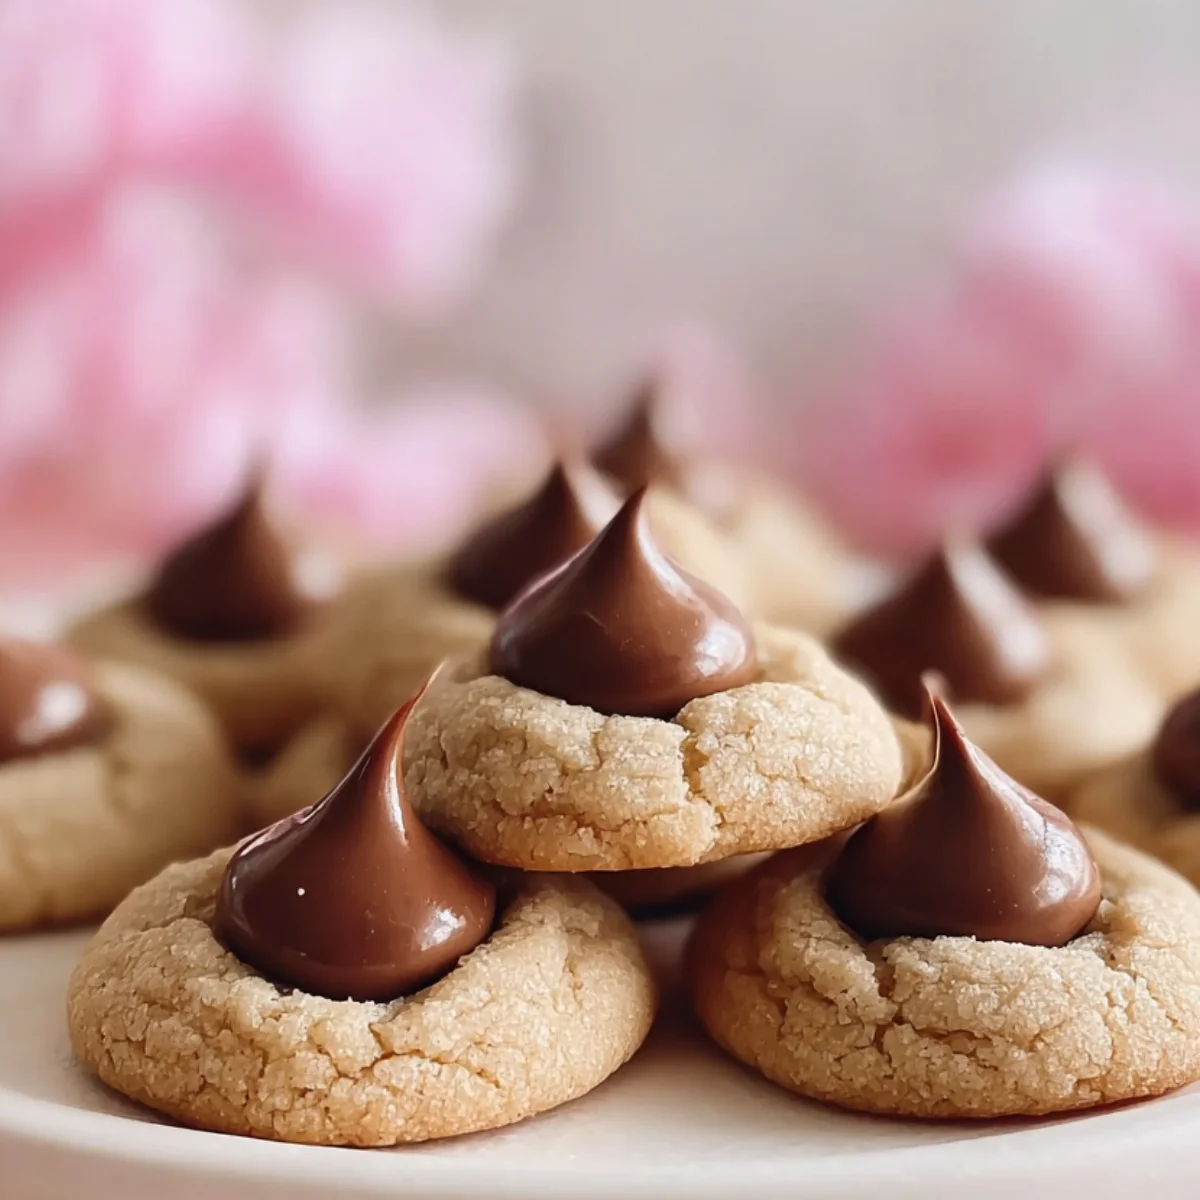
Holiday Variations
- Use red and green Kisses for Christmas
- Pink and red for Valentine's Day
- Pastel colors for Easter celebrations
- Orange and black for Halloween
- Match Kiss colors to any occasion
- Makes presentation extra festive
Equipment For Hershey Kiss Cookies
- Electric mixer (or strong arm)
- Cookie scoop (1 tablespoon size)
- Baking sheets
- Parchment paper
- Wire cooling rack
- Small bowl for rolling sugar
Substitutions
Testing these Hershey Kiss Cookies with Hershey Kisses for different dietary needs taught me what works:
Peanut Butter Options:
- Creamy → Crunchy peanut butter
- Regular → Natural peanut butter (stir well first)
- Peanut → Almond butter
- Traditional → Sunflower seed butter (nut-free)
Sugar Alternatives:
- White sugar → Coconut sugar
- Brown sugar → All white sugar
- Regular → Sugar substitute (baking blend)
- Standard → Honey (reduce liquid slightly)
Butter Swaps:
- Regular butter → Plant-based butter
- Dairy → Coconut oil (melted and cooled)
- Unsalted → Salted (reduce added salt)
- Traditional → Shortening (very traditional method)
Chocolate Options:
- Milk chocolate Kisses → Dark chocolate Kisses
- Regular → Hugs (striped kisses)
- Standard → Caramel-filled Kisses
- Traditional → Mint Kisses for holidays
Top Tip
- The Timing Sweet Spot The question everyone asks is when to press the Kisses - before or after baking? Always after, and immediately is key. The Hershey Kiss Cookies need to be hot enough that the Kiss sinks in slightly and the chocolate bottom softens just enough to adhere, but not so hot that it completely melts. I learned this through trial and error when I waited too long once and the cookies cracked into pieces.
- Don't Skip the Chill If your kitchen is warm or your dough feels too soft to handle, pop it in the fridge for 15-30 minutes before rolling into balls. Warm dough spreads too much in the oven, creating flat Hershey Kiss Cookies that don't hold their Kiss well. I figured this out during a particularly hot August when oliver wanted "Christmas cookies in summer." The first batch spread into puddles, but after chilling the dough, they came out perfect.
FAQ
What can I make out of Hershey Kisses?
Beyond these classic Hershey Kiss Cookies, use Hershey Kisses for brownie toppers, melted into hot chocolate, pressed into Rice Krispie treats, or arranged on pretzel snaps with M&Ms. They work great in cookie bars, as centers for chocolate truffles, or melted for chocolate bark. oliver's favorite is pressing them into warm banana bread right out of the oven for chocolate pockets throughout.
Can I use Hershey Kisses for baking?
Yes, Hershey Kisses work great for baking because they hold their shape well at typical baking temperatures. They're perfect for pressing into cookies, brownies, or muffins. The flat bottom helps them stay put, and they create that signature look everyone loves. Just remember they'll soften when hot, so press gently and let them cool completely before serving to maintain their shape.
When to put Hershey Kisses on cookies before or after?
Always press Hershey Kisses immediately after baking while cookies are hot. The heat softens the Hershey Kiss Cookies enough to accept the Kiss without cracking completely, and the chocolate bottom melts slightly to adhere. Pressing before baking causes the chocolate to melt and lose its shape. Wait more than 2 minutes after baking and cookies become too firm to press without breaking.
What variations can be made to Hershey Kiss cookies?
Try different Kiss flavors like caramel, dark chocolate, or mint. Swap peanut butter for almond or sunflower butter. Add crushed Oreos for cookies and cream style. Make them into thumbprints with jam. Use shortbread base instead of peanut butter. Roll in colored sugars for holidays. Each variation keeps that iconic Kiss topping while changing the Hershey Kiss Cookies base flavor.
Time to Start Baking!
These Hershey Kiss Cookies have become more than just a recipe in our house - they're how we mark seasons, celebrate small victories, and show people we care. There's something special about a cookie that's been made the same way for decades, passed down through families and shared across kitchen tables. When oliver inevitably makes these for his own kids someday, I hope he tells them about the Kiss color assignments and the assembly-line pressing technique. The recipe might stay the same, but the stories and traditions around it keep growing.
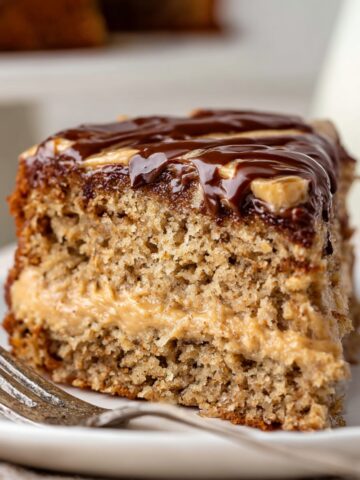
Craving more sweet treats? Try our Best Sticky Toffee Pudding Recipe that delivers that perfect combination of moist cake and caramel sauce that rivals any British pub dessert. Need a comforting dinner before dessert? Our Easy Spaghetti and Meatballs Recipe brings Italian comfort to your table with tender meatballs and rich sauce. And for the ultimate chocolate celebration, our The Best Matilda Chocolate Cake Recipe creates those layers of fudgy perfection that turn any ordinary day into something special.
Share your Hershey Kiss Cookies success! We love seeing your baking adventures and hearing about your own Kiss pressing traditions!
⭐⭐⭐⭐⭐ Rate this Hershey Kiss Cookies and join our baking family!
Related
Looking for other recipes like this? Try these:


Pairing
These are my favorite dishes to serve with Hershey Kiss Cookies


Hershey Kiss Cookies
Equipment
- 1 Electric mixer (Hand or stand mixer)
- 1 Cookie scoop (1-tablespoon size)
- 2-3 Baking sheets
- As needed Parchment paper
- 1 Wire cooling rack
- 1 Small bowl (For rolling sugar)
Ingredients
Cookie Dough
- 1 ¾ cups all-purpose flour
- 1 teaspoon baking soda
- ½ teaspoon salt
- ½ cup unsalted butter - softened
- ½ cup creamy peanut butter
- ½ cup granulated sugar
- ½ cup light brown sugar - packed
- 1 large egg
- 2 tablespoon milk
- 1 teaspoon vanilla extract
For Rolling
- ⅓ cup granulated sugar - for coating
For Topping
- 48 pieces Hershey's Kisses - unwrapped
Instructions
- Whisk together flour, baking soda, and salt. In a large bowl beat butter, peanut butter, granulated sugar, and brown sugar until light and fluffy (about 3 minutes). Add egg, milk, and vanilla. Mix in dry ingredients until just combined.
- Scoop dough into 1-tablespoon balls. Roll smooth in your hands. Coat each ball in granulated sugar.
- Place dough balls on parchment-lined baking sheets, 2 inches apart. Bake at 375°F for 8-10 minutes until edges are set but centers still soft.
- Immediately press one Hershey's Kiss into the center of each hot cookie. Allow cookies to crack naturally around the edges.
- Cool 5 minutes on the baking sheet, then transfer to a wire rack. Let chocolate set for 30 minutes before serving.

Leave a Reply