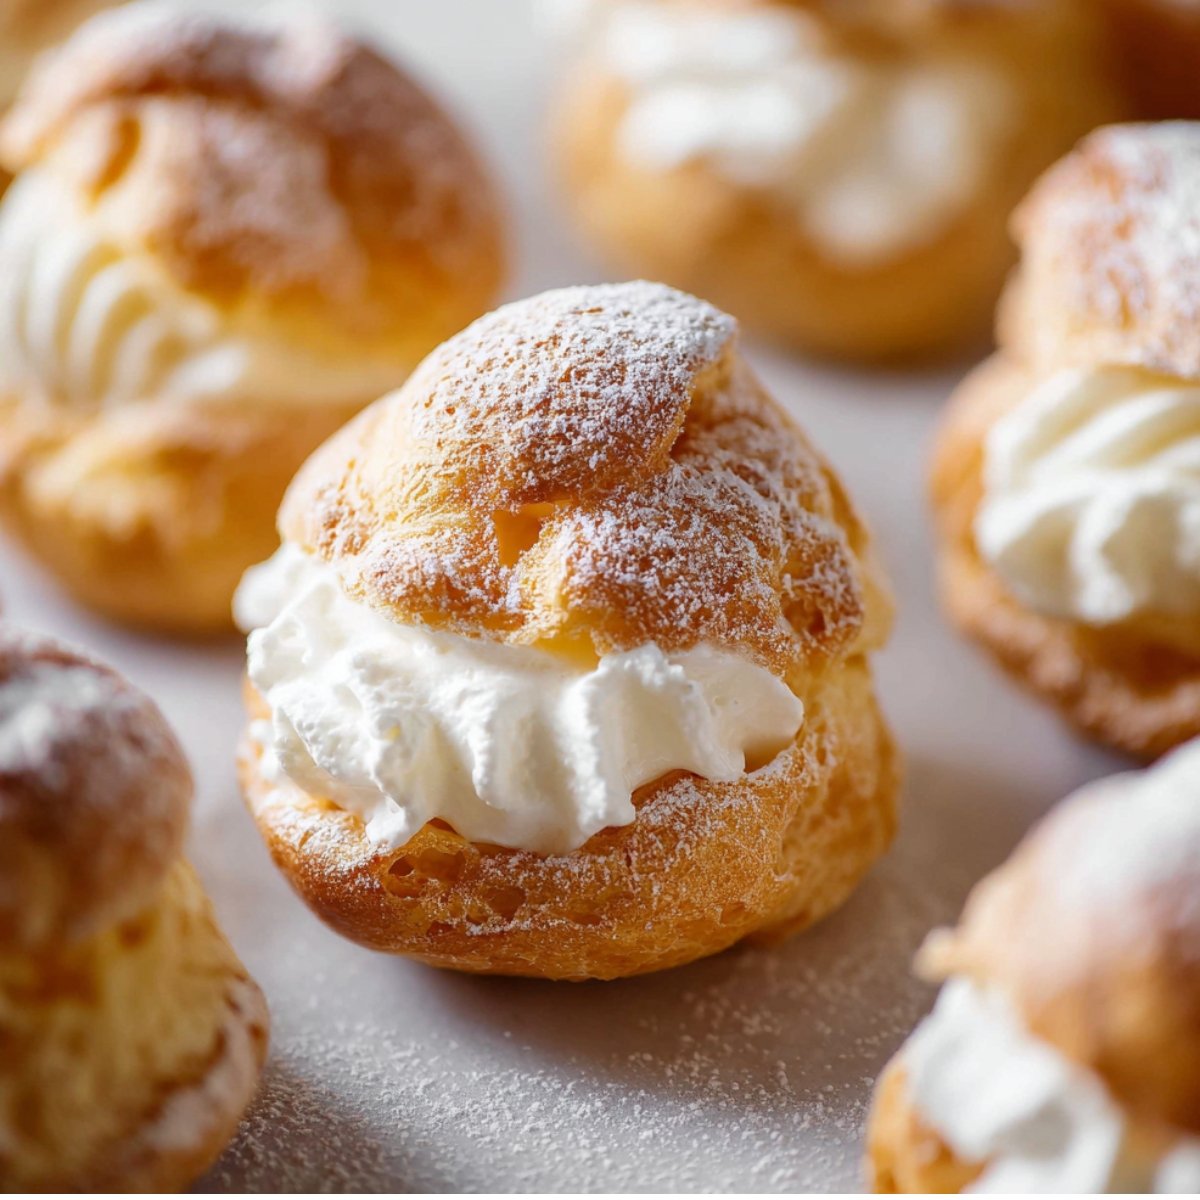
These light, golden puffs of choux pastry are crisp on the outside, soft and airy inside, and ready to hold whatever sweet filling your heart desires. I first tried making them on a rainy Saturday afternoon, half-convinced they'd flop, but when they puffed up in the oven like little edible clouds, I actually gasped. They're surprisingly simple to make with ingredients you probably already have.

If you love delicate pastries, you'll also want to try this Classic Cranberry Curd Tart Recipe or these Easy Strawberry Shortcake Cupcakes for more bakery-style treats at home.
Why You'll Love This Choux Pastry Recipe
This homemade choux pastry dough comes together in one pot and takes less than an hour from start to finish. You don't need special skills or fancy equipment, just a saucepan and a wooden spoon. The shells bake up reliably crisp and sturdy enough to hold pastry cream, whipped cream, or even ice cream without getting soggy. Plus, you can make the dough ahead and keep it in the fridge for up to three days, which makes it perfect for entertaining.
Jump to:
Choux Pastry Ingredients
Here's everything you need to make these airy pastry shells.
See Recipe Card Below This Post For Ingredient Quantities
- Unsalted butter: Adds richness and helps create the tender, crisp texture. Cut it into pieces so it melts evenly.
- Water and milk: The liquid creates steam during baking, which puffs up the dough. Using a mix of water and milk adds a little extra flavor and browning.
- Salt: Balances the sweetness and enhances the overall flavor.
- Granulated sugar: Just a touch of sweetness to complement fillings without being overpowering.
- All-purpose flour: Forms the structure of the pastry. Spoon and level your flour to avoid using too much, which can make the puffs dense.
- Eggs: Bind everything together and add moisture. The eggs also help the pastry rise and turn golden brown.
- Egg wash: Brushing the dough with beaten egg and milk gives the baked shells a beautiful shine.
How to Make Choux Pastry
Follow these steps to create perfect choux pastry shells every time.
Prepare the dough: In a medium saucepan, combine butter, water, milk, salt, and granulated sugar over medium heat. Stir until the butter melts completely. Bring the mixture to a simmer, then reduce the heat to low. Add the flour all at once and stir vigorously until fully incorporated. The dough will pull together into a thick ball. Mash the dough against the sides of the pan for 1 minute to cook the flour, which helps remove the raw taste. Remove from heat.
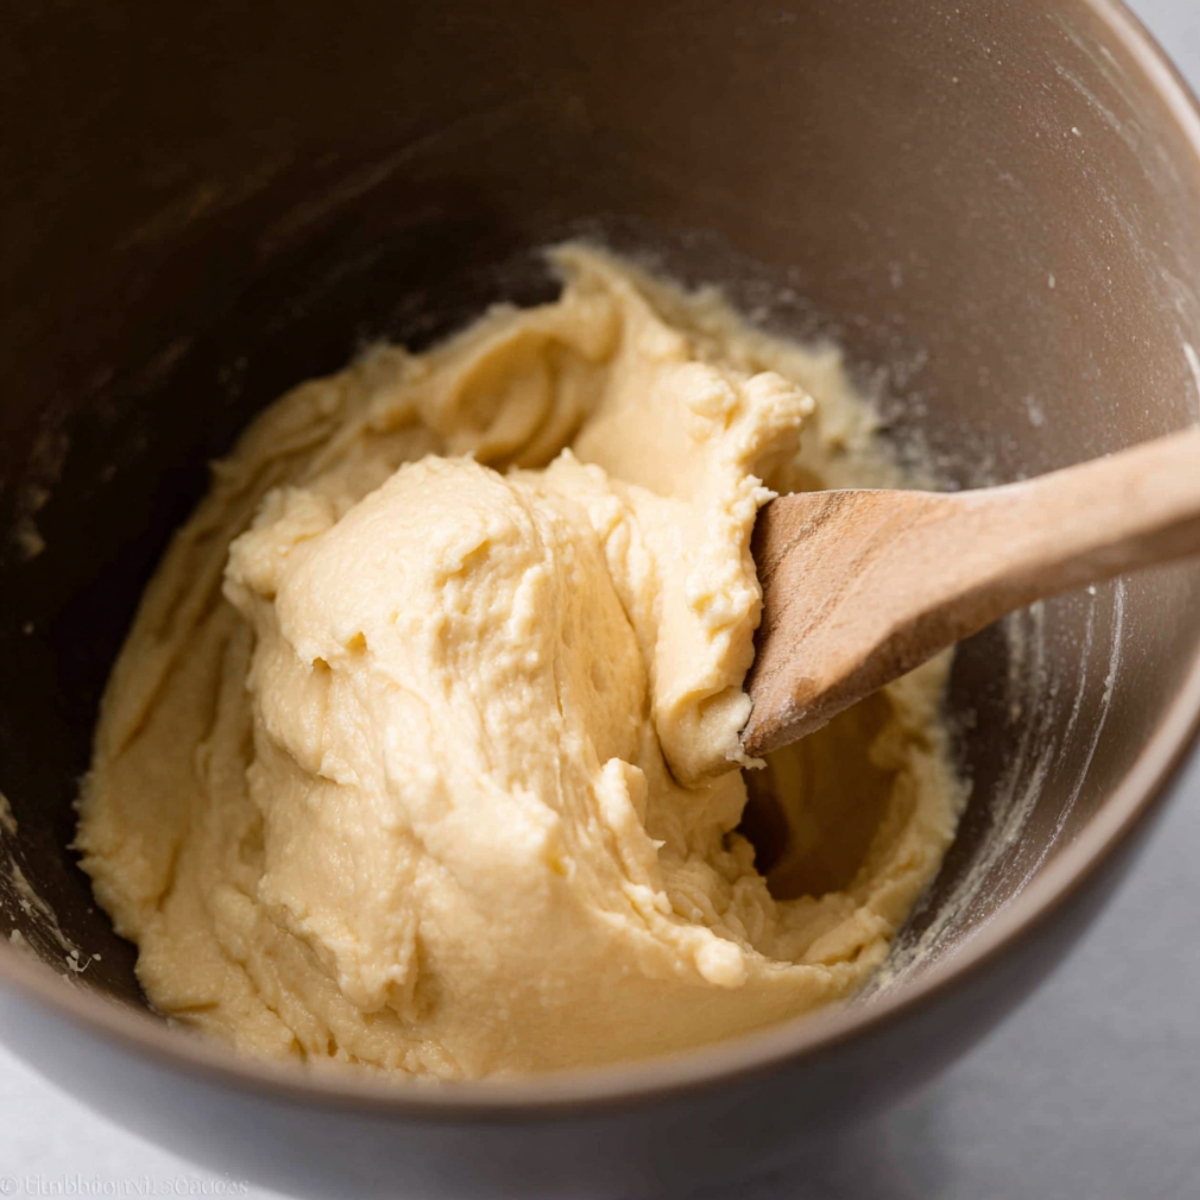
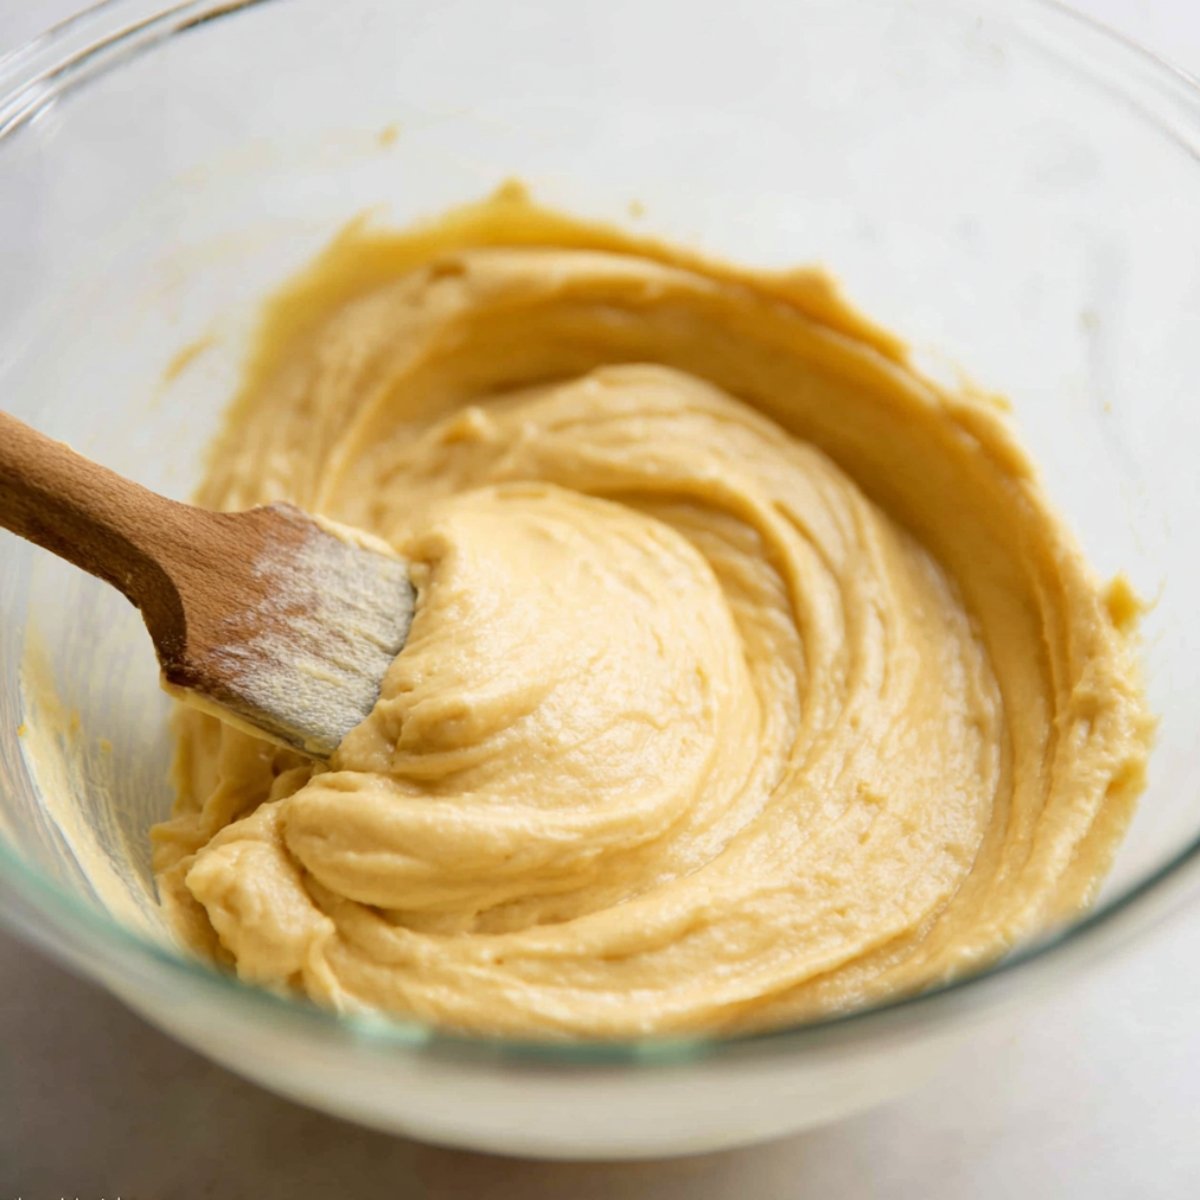
Cool and mix in eggs: Transfer the dough to a stand mixer bowl fitted with a paddle attachment, or use a large mixing bowl and a wooden spoon. Let it cool for a few minutes so the eggs don't scramble when you add them. With the mixer running on low speed, gradually add the beaten eggs in 3 to 4 separate additions, mixing for 30 seconds between each addition. The mixture will look curdled at first, but don't worry. It will become smooth and shiny after all the eggs are incorporated. Stop adding eggs when the dough has a smooth, thick, pipeable consistency that slowly drops from the spoon.
Store or use immediately: You can use the choux pastry dough right away, or refrigerate it in a covered container for up to 3 days. If you refrigerate it, you can pipe and bake it straight from the fridge, though letting it sit at room temperature for a few minutes can make piping easier.
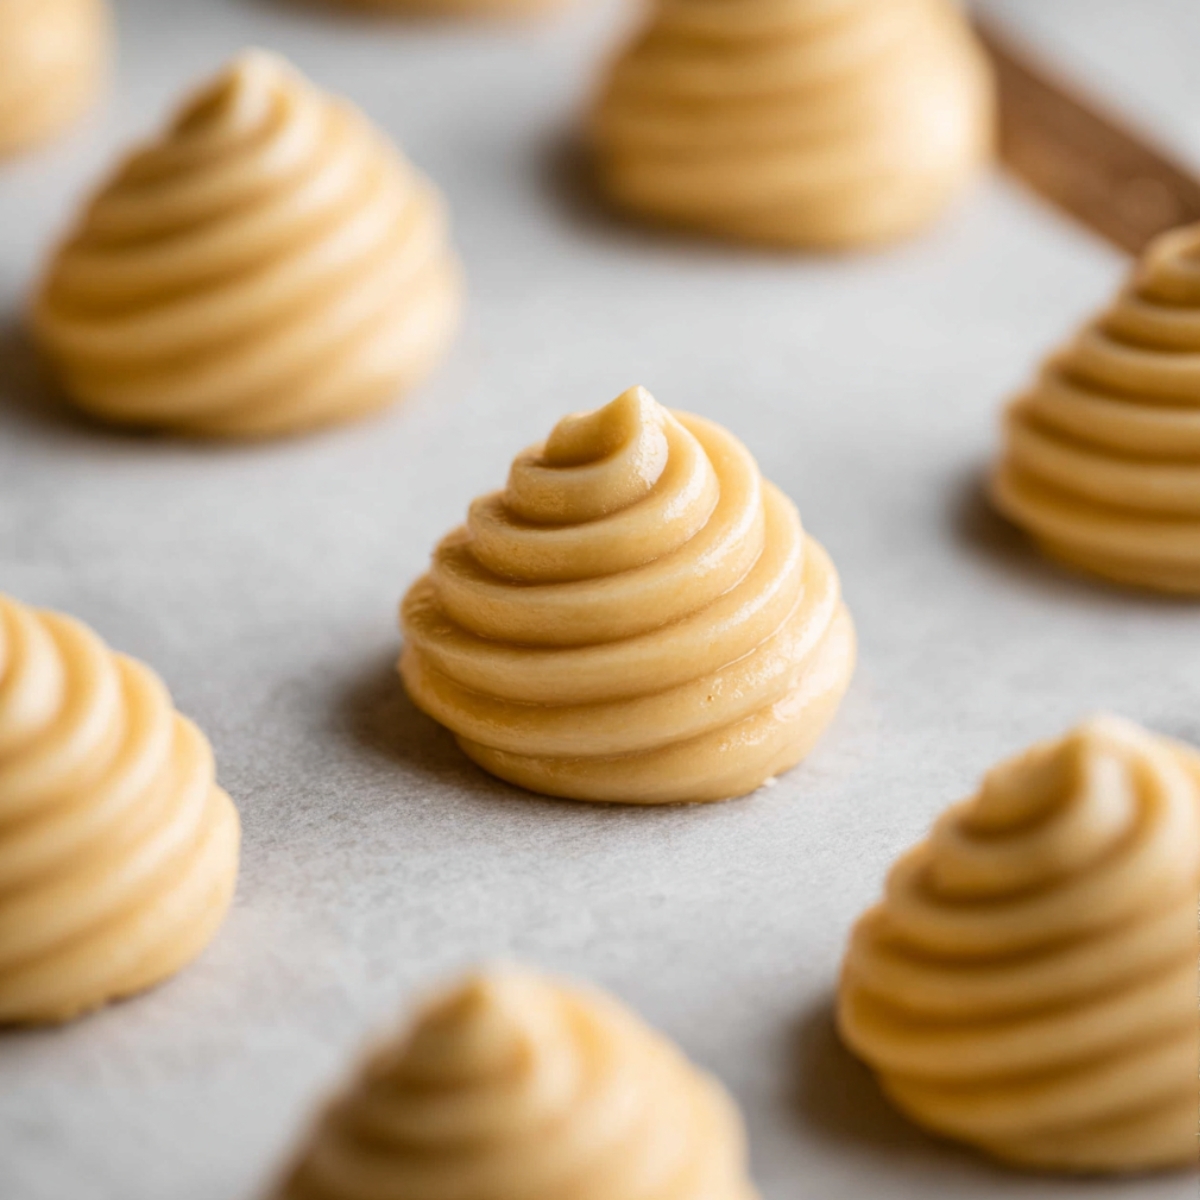
Bake the pastries: Preheat your oven to 400°F (204°C). Line two baking sheets with parchment paper and lightly brush the paper with water to create steam while baking, which helps the puffs rise. Transfer the choux dough to a piping bag fitted with a Wilton 1A piping tip, or use a zipped-top bag with the corner cut off. Pipe 2-inch mounds onto the prepared baking sheets, spacing them 3 inches apart. Use a moistened finger to gently smooth down any peaks, then brush each mound with egg wash for a glossy finish.
Bake the choux pastry: Bake the pastries for 20 minutes without opening the oven door. Then reduce the temperature to 350°F (177°C) and bake for an additional 10 to 15 minutes until the shells are golden brown and crisp. Do not open the oven door during baking, or the pastries might deflate. Once done, transfer them to a cooling rack.
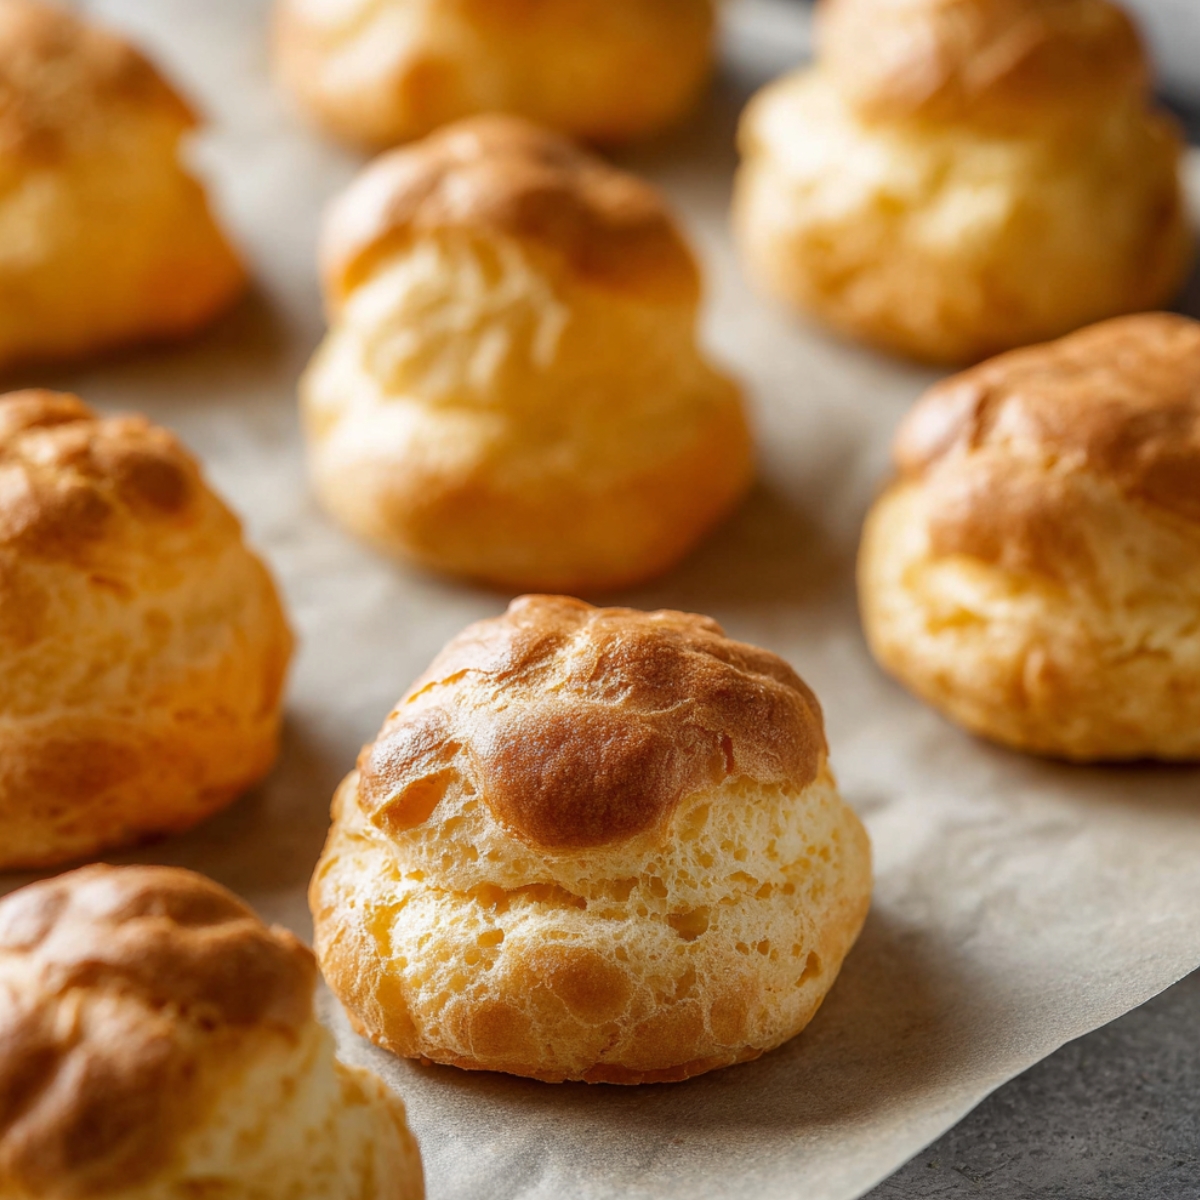
Fill the pastries: Allow the baked shells to cool completely before filling. You can split them open horizontally and spoon in your filling, or poke a small hole in the bottom and pipe the filling inside. Fill them with whipped cream, pastry cream, lemon curd, jam, or any filling you love.
Store: Filled choux pastries can be stored in the refrigerator for up to 3 days. Unfilled shells can be kept at room temperature for 1 day, in the fridge for up to 5 days, or frozen for up to 3 months. Thaw frozen shells in the refrigerator before filling.
Substitutions and Variations
Milk: You can use all water instead of milk, though the flavor will be slightly less rich. Whole milk or 2% both work well.
Butter: Stick with unsalted butter so you can control the salt level. Salted butter might make the dough too salty.
Eggs: Large eggs are standard for this recipe. If your dough seems too thick after adding all the eggs, you can beat another egg and add it a tablespoon at a time until you reach the right consistency.
Sugar: For savory choux pastries like gougères, you can leave out the sugar entirely and add shredded cheese or herbs to the dough.
Flavor additions: Stir in a teaspoon of vanilla extract with the eggs for a subtle vanilla flavor, or add a tablespoon of cocoa powder to the flour for chocolate choux pastry shells.
Equipment For Choux Pastry
- Saucepan: A medium-sized saucepan is perfect for cooking the dough on the stovetop.
- Wooden spoon: Sturdy enough to stir the thick dough without bending.
- Electric mixer: A stand mixer or handheld mixer makes adding the eggs much easier, though you can do it by hand if you have strong arms.
- Baking sheets: Two standard baking sheets give you enough space to pipe all the pastries at once.
- Parchment paper: Prevents sticking and makes cleanup easy.
- Pastry brush: For brushing the parchment with water and applying egg wash.
- Piping bag and tip: A reusable or disposable piping bag fitted with a Wilton 1A tip creates neat, uniform puffs.
Storage and Make-Ahead Tips
Unbaked dough: Store choux pastry dough in an airtight container in the refrigerator for up to 3 days. Pipe and bake it straight from the fridge when you're ready.
Baked shells: Keep unfilled shells at room temperature for 1 day, or refrigerate them for up to 5 days in an airtight container. For longer storage, freeze them in a freezer bag for up to 3 months.
Filled pastries: Once filled, choux pastries are best eaten within a few hours, but you can refrigerate them for up to 3 days. Keep in mind that the shells may soften slightly over time.
Reheating: If your baked shells lose their crispness, reheat them in a 300°F oven for 5 to 10 minutes to restore the crisp exterior.
Expert Tips
Cook the flour thoroughly: That one minute of mashing the dough against the pan isn't just for fun. It cooks out the raw flour taste and helps the dough absorb the eggs better.
Add eggs slowly: Rushing the eggs can make the dough too loose. Add them gradually and wait until each addition is fully incorporated before adding more.
Don't open the oven: Opening the oven door releases the steam that makes the pastries puff. Keep it closed until the very end.
Check the consistency: The dough should be thick enough to hold its shape when piped, but smooth enough to flow slowly from a spoon. If it's too stiff, the pastries won't rise properly.
Brush with water: Lightly brushing the parchment paper with water before baking creates extra steam, which helps the pastries puff up higher.
Use room temperature eggs: Cold eggs can cool down the dough too much, making it harder to incorporate them smoothly.
Serving Suggestions
These choux pastry shells are incredibly versatile. Here are a few ideas to get you started.
Fill them with sweetened whipped cream and dust with powdered sugar for classic cream puffs. You can also try filling them with vanilla pastry cream and dipping the tops in chocolate ganache for homemade eclairs. For something lighter, spoon in lemon curd and top with fresh berries. If you're feeling indulgent, split them open and fill them with ice cream, then drizzle with hot fudge or caramel sauce. These pair beautifully with coffee or tea, and they make an impressive dessert when you serve them alongside something like this Easy Pear Tarte Tatin Recipe.
FAQ
How to make easy choux pastry?
Choux pastry is easier than it looks. Start by melting butter with water, milk, salt, and sugar, then stir in flour and cook the dough for a minute. Let it cool slightly, then beat in eggs one at a time until the dough is smooth and glossy. Pipe it onto a baking sheet, brush with egg wash, and bake. The whole process takes about 15 minutes of hands-on time.
Why is choux pastry called choux?
The word "choux" means cabbage in French, and the baked pastries supposedly resemble little cabbages. The name stuck even though most people think they look more like puffy clouds than vegetables.
What products are made from choux pastry?
Choux pastry is used to make cream puffs, profiteroles, eclairs, croquembouche, Paris-Brest, churros, and savory gougères. It's one of the most versatile pastry doughs in baking. Oliver always asks for cream puffs, but I've been sneaking in savory cheese puffs for appetizers lately.
Why is choux pastry difficult?
Choux pastry has a reputation for being tricky because the dough needs the right consistency, and opening the oven door too soon can make the pastries collapse. But once you understand the technique, it's actually pretty forgiving. The key is adding the eggs slowly and resisting the urge to peek while they bake.
Related
Looking for other recipes like this? Try these:


Pairing
These are my favorite dishes to serve with Choux Pastry


Choux Pastry (Pâte à Choux)
Ingredients
- ½ cup 113g unsalted butter cut into 8 pieces
- ½ cup 120ml water
- ½ cup 120ml whole milk or 2% milk
- ¼ teaspoon salt
- 2 teaspoons granulated sugar
- 1 cup 125g all-purpose flour spooned & leveled
- 4 large eggs beaten
- Egg wash: 1 egg beaten + 1 Tablespoon milk or water
Instructions
- In a medium saucepan over medium heat, combine the butter, water, milk, salt, and sugar. Stir until the butter is fully melted and the mixture comes to a simmer.
- Once simmering, reduce the heat to low and stir in the flour all at once. Continue stirring until the dough comes together and forms a ball. Cook the dough for 1 minute to gently cook the flour.
- Remove the pan from the heat and transfer the dough to the bowl of a stand mixer (fitted with the paddle attachment) or a large mixing bowl if using a handheld mixer. Allow the dough to cool for a few minutes.
- With the mixer running on low speed, add the beaten eggs in 3-4 separate additions, mixing for 30 seconds between each addition. The mixture will look curdled but will come together as you continue mixing. Stop when the dough is thick, shiny, and has a pipeable consistency. Do not add all the eggs at once, and leave a few teaspoons behind for the egg wash.
- Once the dough is ready, transfer it to a piping bag fitted with a large round piping tip (like Wilton 1A) or a zip-top bag with the tip cut off.
- Preheat the oven to 400°F (204°C) and line two baking sheets with parchment paper. Lightly moisten the parchment paper with water to create a humid environment.
- Pipe 2-inch mounds of dough about 3 inches apart on the prepared sheets. Smooth down any peaks with a water-moistened finger and brush with egg wash.
- Bake for 20 minutes at 400°F, then reduce the temperature to 350°F (177°C) and continue baking for an additional 10-15 minutes, until the puffs are golden brown. Do not open the oven door during baking.
- Once baked, transfer the puffs to a cooling rack and allow them to cool completely.
- Once cooled, split open the puffs and fill with your choice of filling, such as whipped cream, pastry cream, or ice cream.

Leave a Reply