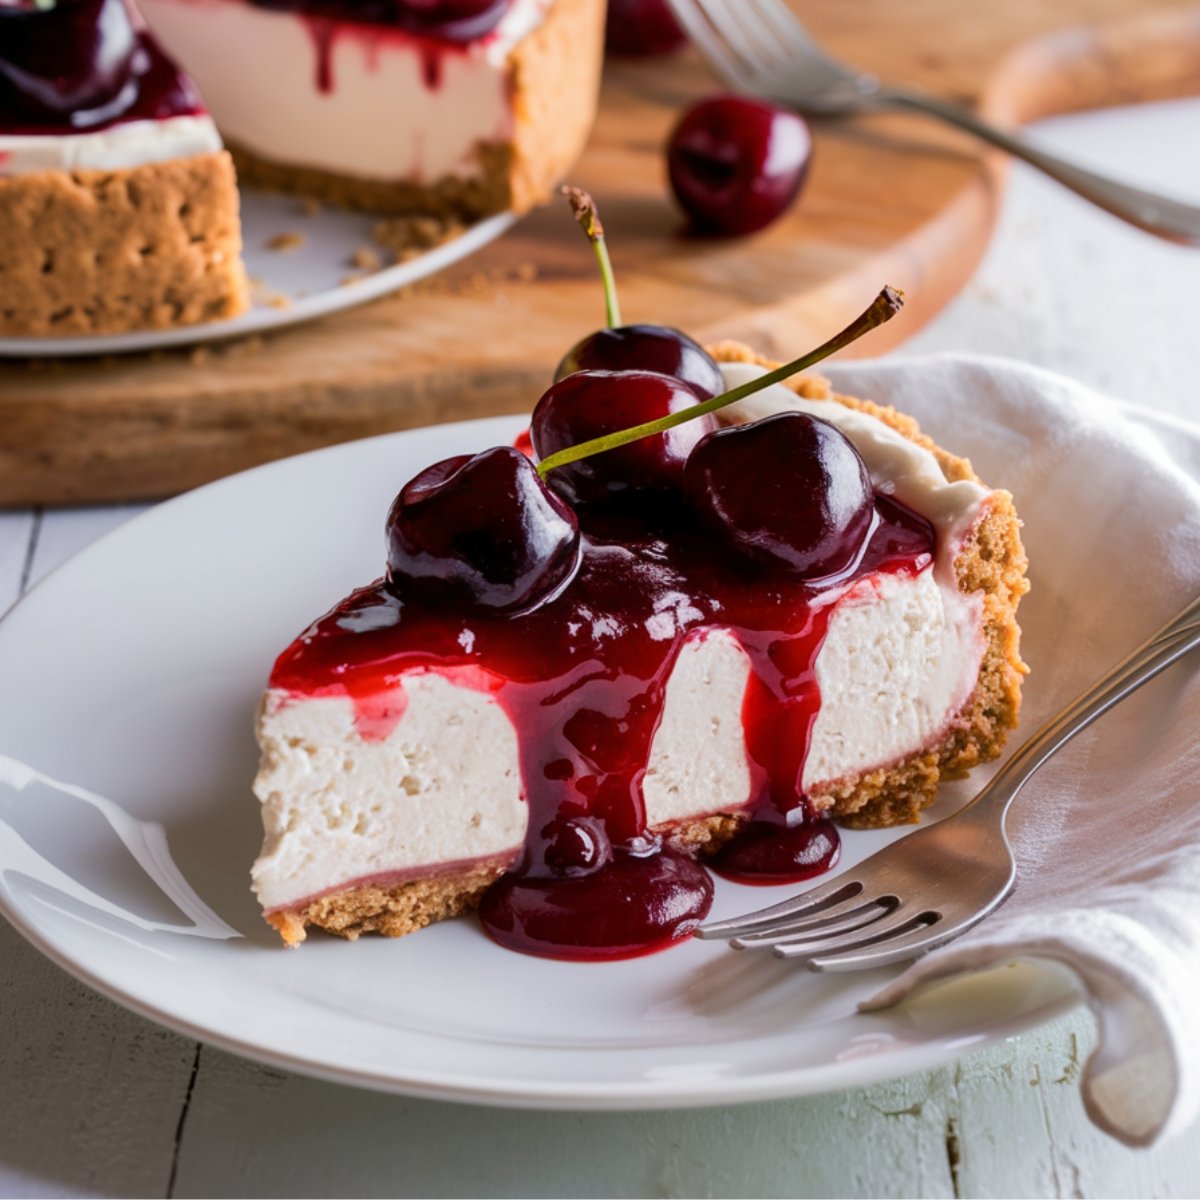
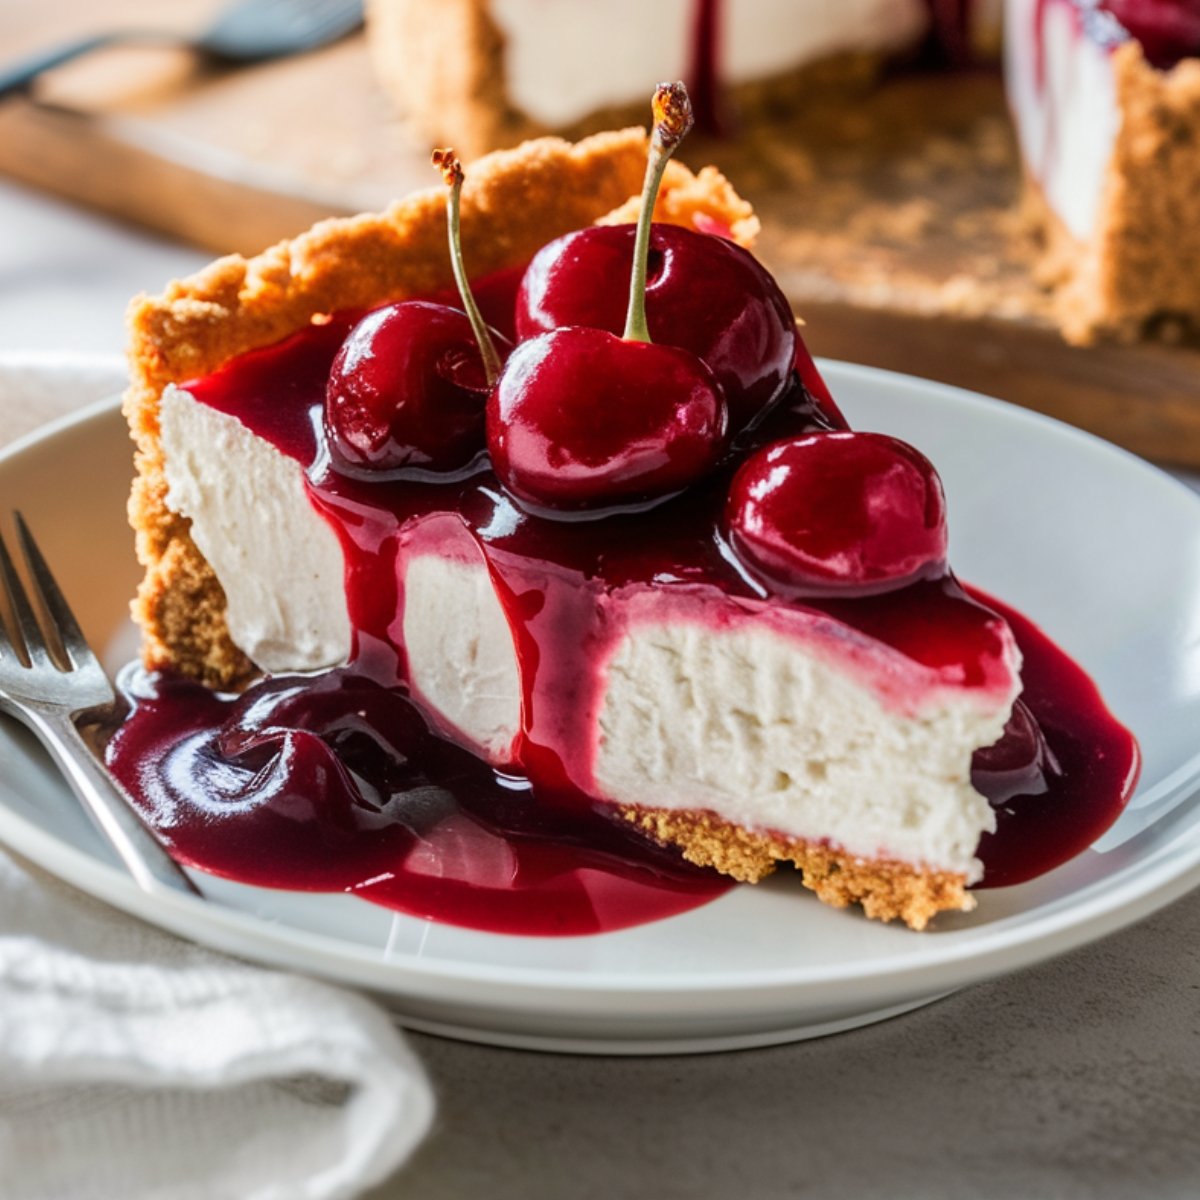
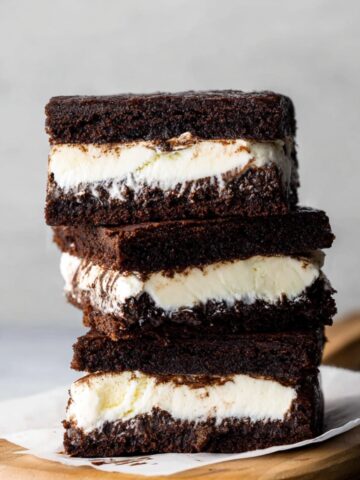
Ready to make a cherry cheesecake that'll have everyone asking for seconds? Trust me, there's something magical about pulling a Cherry Cheesecake Recipe out of your fridge and watching people's eyes light up when you serve it. This recipe combines a crunchy graham cracker crust (yum!) with a super creamy filling and a gorgeous cherry topping that's the perfect mix of sweet and tangy. Don't worry if you've never made cheesecake before - I've got your back with this foolproof cherry cheesecake recipe that'll make you look like a baking superstar!
Why You'll Love This Cherry Cheesecake Recipe
Cherry Cheesecake Recipe has been gracing dessert tables for generations, and for good reason. The combination of creamy cheesecake and fruity cherry topping creates a perfect harmony of flavors and textures that's hard to resist. It's particularly popular during summer when fresh cherries are in season, but thanks to readily available cherry preserves and canned cherry pie filling, you can enjoy this delectable dessert year-round.
This Cherry Cheesecake Recipe is perfect for special occasions like birthdays and holidays, but it's simple enough to make whenever you're craving something sweet. It pairs wonderfully with coffee or tea, making it an ideal dessert for gatherings or a special treat after dinner.
Jump to:
- Why You'll Love This Cherry Cheesecake Recipe
- Ingredients
- Cherry Cheesecake Recipe Instructions
- Hints and Tips for Perfect Cherry Cheesecake Recipe
- Dietary Benefits & Serving Suggestions
- Recipe Variations & Substitutions
- Equipment For Cherry Cheesecake Recipe
- Storage Instructions
- Top Tip
- Grandma's Magic Touch:
- FAQ
- How did your Cherry Cheesecake Recipe turn out?
- Related
- Pairing
- Easy No-Bake Cherry Cheesecake Recipe
Ingredients
Let's Round Up Your Crust Ingredients:
- 1½ cups graham cracker crumbs (that's about 10 full graham crackers crushed to bits!)
- ¼ cup sugar (just the regular granulated kind)
- 6 tablespoons butter (unsalted please), melted and ready to make magic
- A tiny pinch of salt (trust me, it makes a difference!)
For That Dreamy Cheesecake Filling:
- 4 blocks (8 oz each) cream cheese - make sure they're softened! Nobody wants to battle cold cream cheese
- 1¼ cups sugar to make it sweet and wonderful
- ½ cup sour cream (room temp is key for smooth results!)
- 2 teaspoons vanilla extract (the real stuff is best if you have it)
- 4 large eggs hanging out at room temperature
- 2 tablespoons all-purpose flour (this helps prevent cracks - smart, right?)
- 2 teaspoons lemon zest if you're feeling fancy (totally optional, but adds that "what's that amazing flavor?" factor)

For The Gorgeous Cherry Topping:
- 4 cups fresh cherries, pitted (or take the easy route with 2 cans of cherry pie filling - I won't tell!)
- ½ cup sugar (skip this if you're using the canned filling)
- 2 tablespoons cornstarch (again, only for fresh cherries)
- 2 tablespoons lemon juice (brings out that cherry flavor - skip for canned filling)
- ¼ teaspoon almond extract (totally optional but WOW does it make those cherries pop!)

Cherry Cheesecake Recipe Instructions
Let's Make This Cherry Cheesecake Recipe Together!
Step 1: Let's Get That Crust Ready
- First things first - preheat your oven to 325°F (165°C). Grab your 9-inch springform pan and wrap the outside with aluminum foil. This is your leak protection! Trust me, nothing ruins a good Cherry Cheesecake Recipe like a soggy bottom from bath water sneaking in.
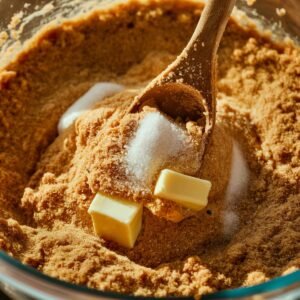
- Mix up your graham cracker crumbs, sugar, melted butter, and that pinch of salt in a bowl. Keep stirring until it looks like wet sand (you know, like when you're building sandcastles at the beach).
- Time to build your crust! Press that mixture into your pan - I like to use the bottom of a measuring cup to really pack it in. Go about 1 inch up the sides too. Think of it as building the perfect foundation for your cheesecake masterpiece!
- Pop it in the oven for just 10 minutes. While it's baking, do a little happy dance because you're already on your way to cheesecake heaven! Once it's done, let it cool but keep that oven on.
Step 2: Creating Your Dreamy Cheesecake Filling
- Grab your mixer and beat that cream cheese like it owes you money! About 3-4 minutes on medium speed should do it. Keep scraping down the sides - we're on a mission for silky smoothness here, no lumps allowed!
- Slowly add your sugar while the mixer's running (like, really slowly - don't dump it all at once or you'll have a sugar snowstorm in your kitchen!). Keep beating until it's fluffy and looks irresistible.
- Now gently mix in your sour cream and vanilla - just until they're combined. We're being gentle from here on out!
- Sprinkle in that flour and lemon zest (if you're using it). The flour is our secret anti-crack insurance!
- Add those eggs one at a time, mixing just enough to get them blended in. This is not the time to go crazy with mixing - we're treating our batter like it's delicate from now on. Too much air = cracks, and we want perfection!
- Pour this velvety goodness over your crust and smooth the top. Take a moment to admire your work - it already looks amazing!
Step 3: Baking Your Cherry Cheesecake (With Love)
- Here's where the magic happens! Place your foil-wrapped pan in a larger roasting pan and create a spa bath for your cheesecake by adding hot water around it, about halfway up the sides. This gives the most gentle, even heat.
- Carefully slide the whole setup into the oven (go slow - no sloshing!) and bake for 60-70 minutes. How do you know it's done? The edges should be set but the center should still have a little wiggle - like it's doing a tiny dance!
- Now the patience part: Turn off the oven, crack the door open (I stick a wooden spoon in to hold it open), and let your cheesecake cool slowly for an hour. This is prime time to lick the mixing bowl if you haven't already!
- After its spa treatment, take the cheesecake out, carefully remove the foil, and let it cool completely on a rack.
- Once it's cool, pop it in the fridge for at least 6 hours, but overnight is even better. I know it's hard to wait, but trust me - your patience will be rewarded!
Step 4: Making That Cherry Magic Happen
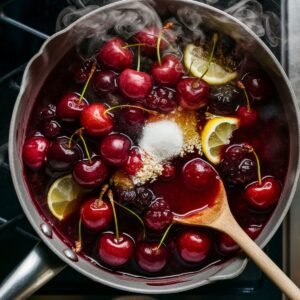
- If you're using fresh cherries: Mix your pitted cherries, sugar, cornstarch, and lemon juice in a saucepan. Cook over medium heat, stirring often (this is not the time to check TikTok), until it bubbles and thickens - about 5-8 minutes. It'll get all glossy and gorgeous!
- Take it off the heat and add that almond extract if you're using it. Let it cool completely - no hot topping on cold cheesecake or you'll have a melty mess!
- Using canned cherry pie filling? You lucky duck - just open those cans and you're good to go!
Step 5: The Grand Finale - Putting It All Together!
- The moment has arrived! When your cheesecake has chilled completely, carefully remove it from the springform pan. This is like unveiling your masterpiece - go slow and be gentle!
- Now for the crowning glory - spoon that luscious cherry topping all over. You can cover the whole thing or get creative with a pattern. Either way, it's going to look spectacular!
- Want to make it extra fancy? Pipe some whipped cream around the edges. I like to use a star tip for that bakery-worthy finish. Snap a picture for social media before everyone dives in - this Cherry Cheesecake Recipe deserves to be shown off!
Hints and Tips for Perfect Cherry Cheesecake Recipe
The secret to a crack-free cheesecake is all in the temperature. Make sure all your ingredients are at room temperature before mixing, and never skip the water bath! This provides gentle, even heat that helps the cheesecake bake consistently throughout.
To easily remove the cheesecake from the springform pan, run a thin knife or offset spatula around the edge before releasing the clasp. For clean slices, dip your knife in hot water and wipe it dry between cuts.
Dietary Benefits & Serving Suggestions
This cherry cheesecake is naturally gluten-free if you use an alternative crust, and it's packed with calcium from all that delicious cream cheese. While it's definitely an indulgent treat, a little slice goes a long way in satisfying your sweet tooth.
For a stunning dessert table, serve your cherry cheesecake alongside fresh berries, chocolate-dipped strawberries, or a small scoop of vanilla ice cream. A dollop of freshly whipped cream adds an extra touch of luxury. Pair it with a cup of coffee, espresso, or even a dessert wine for an elevated experience.
Recipe Variations & Substitutions
- Chocolate Cherry Cheesecake: Add ⅓ cup of cocoa powder to the filling for a chocolate twist, or use chocolate graham crackers for the crust.
- Swirled Cherry Cheesecake: Before baking, swirl some of the cherry topping into the cheesecake batter for a marbled effect.
- Mini Cherry Cheesecakes: Use a muffin tin lined with paper cups to create individual servings. Adjust baking time to 20-25 minutes.
- Vegan Option: Substitute the cream cheese with dairy-free alternatives, use coconut cream instead of sour cream, and replace eggs with a combination of cornstarch and aquafaba.
- No-Bake Version: If you're short on time or don't want to use the oven, try a no-bake version using gelatin to set the filling.
Equipment For Cherry Cheesecake Recipe
A good quality 9-inch springform pan is essential for this cherry cheesecake recipe. The removable sides make it easy to release the cheesecake without damaging its structure. A stand mixer or powerful hand mixer will also make the process much easier, ensuring your cream cheese mixture is perfectly smooth.
If you're pitting fresh cherries, a cherry pitter is a worthwhile investment that will save you time and mess. A large roasting pan for the water bath and an offset spatula for smoothing the filling are also helpful tools.
Storage Instructions
This Cherry Cheesecake Recipe keeps beautifully in the refrigerator for up to 5 days. Cover it loosely with plastic wrap or store it in an airtight container to prevent it from absorbing other flavors from the fridge.
You can also freeze individual slices or the entire cheesecake for up to 2 months. Wrap it well in plastic wrap, then aluminum foil, to prevent freezer burn. Thaw overnight in the refrigerator before serving.
Top Tip
The number one tip for perfect Cherry Cheesecake Recipe is patience. Don't rush the cooling process! The slow cooling in the turned-off oven, followed by complete cooling at room temperature, and then chilling in the refrigerator are all essential steps for achieving that perfect texture and preventing unsightly cracks.
Grandma's Magic Touch:
Want to know what makes this Cherry Cheesecake Recipe truly special? It's all about those little grandma-approved tricks that transform a good dessert into an unforgettable one!
First, the cream cheese secret: let those blocks sit out for a full hour before mixing. Cold cream cheese is the enemy of smooth cheesecake! Grandma would always say, "You can't rush perfection, honey."
Next, add just a tiny pinch of salt to your cherry topping - it might sound strange, but it magically enhances the cherry flavor without making anything salty. This little trick makes the Cherry Cheesecake Recipe pop with flavor!
When pressing in your crust, use the bottom of a measuring cup wrapped in plastic wrap - it creates that perfectly even layer that looks like it came from a bakery.
FAQ
What are the ingredients for cherry cheesecake?
For this Cherry Cheesecake Recipe, you'll need graham crackers, butter, and sugar for the crust; cream cheese, sugar, sour cream, vanilla, eggs, and flour for the filling; and either fresh cherries (with sugar, cornstarch, and lemon juice) or canned cherry pie filling for the topping.
What is the secret to making good cheesecake?
The secret to a perfect Cherry Cheesecake Recipe is room temperature ingredients, gentle mixing, using a water bath while baking, and allowing for slow cooling. These steps prevent cracks and ensure that smooth, creamy texture everyone loves.
How to make crust for cherry cheesecake?
Mix graham cracker crumbs with sugar, melted butter, and salt until it resembles wet sand. Press firmly into your springform pan and bake for 10 minutes at 325°F before adding the filling. This quick pre-bake keeps your crust crisp, not soggy.
Is sour cream or heavy cream better for cheesecake?
Sour cream is better for this Cherry Cheesecake Recipe. It adds a slight tanginess that balances the sweetness and complements the cherry topping, while creating that classic cheesecake texture that's rich yet light.
How did your Cherry Cheesecake Recipe turn out?
This Cherry Cheesecake Recipe delivers the perfect balance of creamy and sweet-tart flavors. A buttery graham cracker crust supports a velvety smooth filling, all topped with vibrant cherries. Whether for special occasions or just because, this foolproof recipe creates an impressive dessert everyone will love.
Craving more homestyle baking? Warm up your kitchen with our seasonal favorite Upside Down German Chocolate Cake, a twist on the classic with gooey caramelized coconut and pecans. Love fruity flavors? Our Blueberry Pound Cake Recipe is bursting with juicy blueberries in every bite. Need a quick and delicious treat? Cake Mix Cinnamon Rolls are the easiest way to enjoy warm, gooey cinnamon rolls without all the fuss.
Did you make this Cherry Cheesecake Recipe? We'd love to hear about your experience! Leave a star rating and share your thoughts in the comments. Did you try any creative twists or use any unique ingredients? Your feedback not only helps others but also contributes to our growing community of home cooks. Don't forget to share a photo of your culinary creation!
Related
Looking for other recipes like this? Try these:


Pairing
These are my favorite dishes to serve with Cherry Cheesecake Recipe


Easy No-Bake Cherry Cheesecake Recipe
Equipment
- 9-inch springform pan (Ensures easy removal of intact cheesecake)
- Electric mixer (For smooth, lump-free cream cheese mixture)
- Large roasting pan (Holds water bath; must be larger than springform)
- Aluminum foil (Prevents water leakage; wrap pan tightly)
- Measuring cups and spoons (For accurate ingredient measurements)
- Medium saucepan (For cooking cherry topping if using fresh cherries)
- Mixing bowls (Separate bowls for crust and filling preparation)
- Offset spatula (For smooth top and clean edges)
- Wire cooling rack (Prevents soggy bottom while cooling)
Ingredients
For the Graham Cracker Crust:
- 1½ cups graham cracker crumbs - Use store-bought or pulse crackers until fine
- ¼ cup granulated sugar - Helps bind crust and adds sweetness
- 6 tablespoons unsalted butter - Melt completely before using
- Pinch of salt - Enhances overall flavor
For the Cheesecake Filling:
- 4 packages - 8 oz each cream cheese, softened to room temperature
- 1¼ cups granulated sugar - Provides structure and sweetness
- ½ cup sour cream - Adds moisture and tangy flavor
- 2 teaspoons vanilla extract - Pure extract preferred for best flavor
- 4 large eggs - Room temperature prevents filling cracks
- 2 tablespoons all-purpose flour - Stabilizes the filling
- 2 teaspoons lemon zest - Optional brightness enhancer
For the Cherry Topping:
- 4 cups fresh cherries - pitted (or 2 cans of cherry pie filling)
- ½ cup granulated sugar - omit if using canned filling
- 2 tablespoons cornstarch - omit if using canned filling
- 2 tablespoons lemon juice - omit if using canned filling
- ¼ teaspoon almond extract - optional
Instructions
- Preheat oven to 325°F (165°C). Wrap outside of springform pan with aluminum foil.
- Mix graham cracker crumbs, sugar, melted butter, and salt until mixture resembles wet sand.

- Press mixture firmly into bottom and 1 inch up sides of springform pan. Use the bottom of a measuring cup for even compaction.
- Bake crust for 10 minutes, then remove and allow to cool. Maintain oven temperature.
- Beat cream cheese in large bowl until completely smooth, about 3-4 minutes.
- Gradually add sugar and continue beating until well incorporated and fluffy.
- Add sour cream and vanilla extract, mixing just until combined.
- Mix in flour and lemon zest if using.
- Add eggs one at a time, beating on low speed after each addition until just combined.
- Pour filling over pre-baked crust, smoothing the top with a spatula.
- Place foil-wrapped springform pan in larger roasting pan. Fill roasting pan with hot water about halfway up sides of springform pan.
- Bake for 60-70 minutes until edges are set but center still has slight jiggle.
- Turn off oven, crack door open, let cheesecake cool in oven for 1 hour.
- Remove from water bath, peel off foil, cool completely on wire rack.
- Once cooled, cover and refrigerate for at least 6 hours, preferably overnight.
- If using fresh cherries, combine cherries, sugar, cornstarch, and lemon juice in saucepan. Cook over medium heat until thickened, about 5-8 minutes.
- Remove cherry mixture from heat, add almond extract if using. Cool completely.
- Once cheesecake has chilled completely, carefully remove from springform pan and transfer to serving plate.
- Spoon cherry topping over cheesecake, covering entire surface or creating a decorative pattern.
- Optionally, pipe whipped cream around the edges before serving.
Notes
- Ensure all ingredients are at room temperature for smooth texture.
- The water bath is essential for preventing cracks.
- Cool gradually to prevent cracks.
Leave a Reply