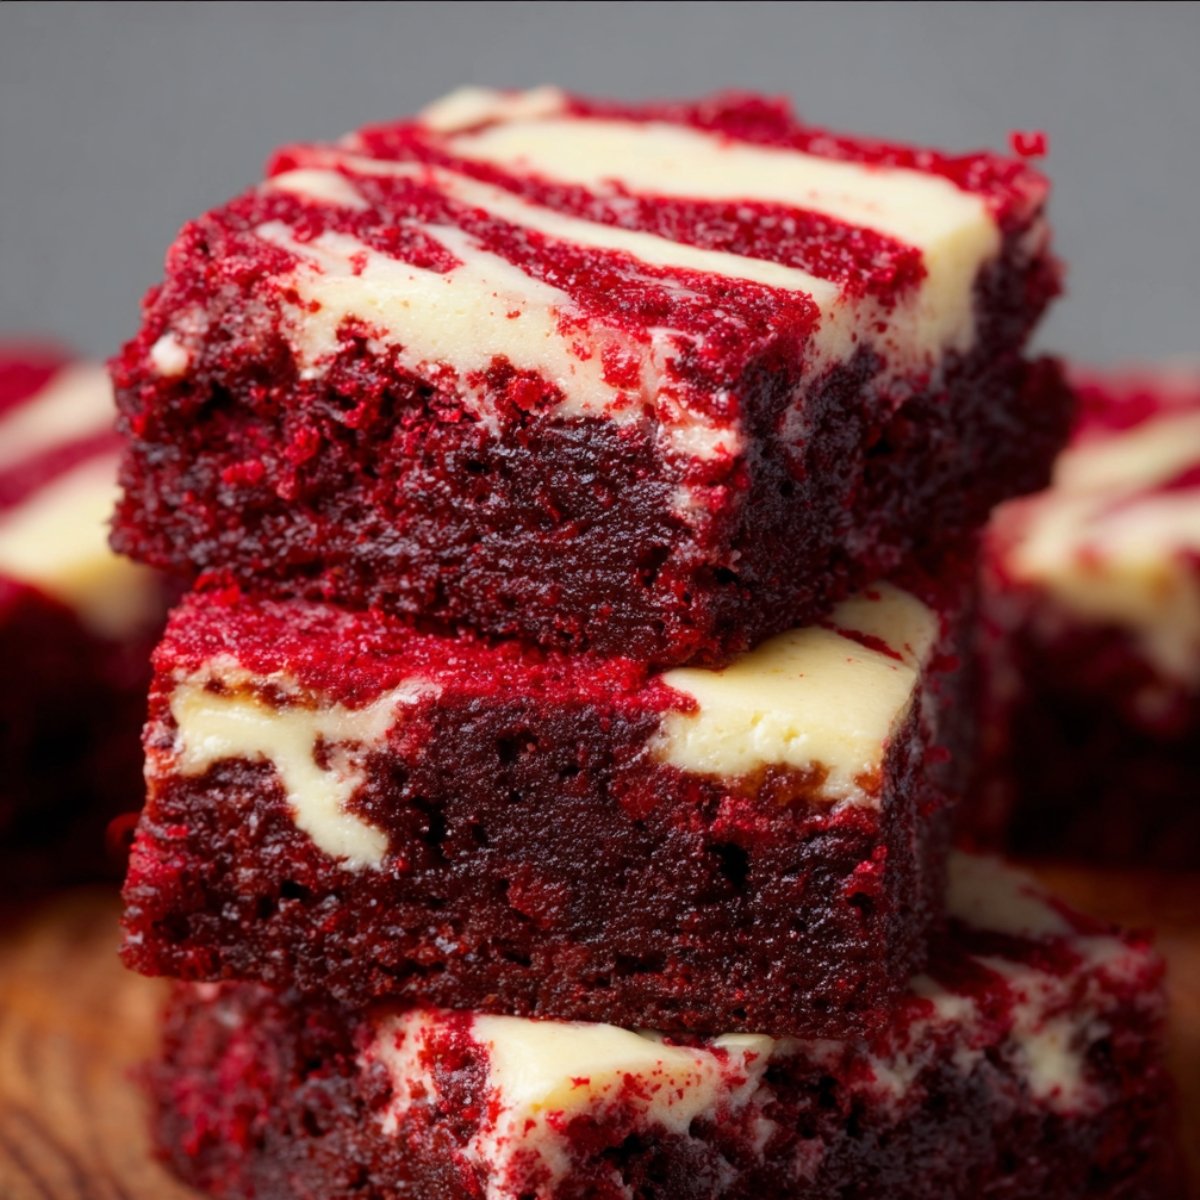
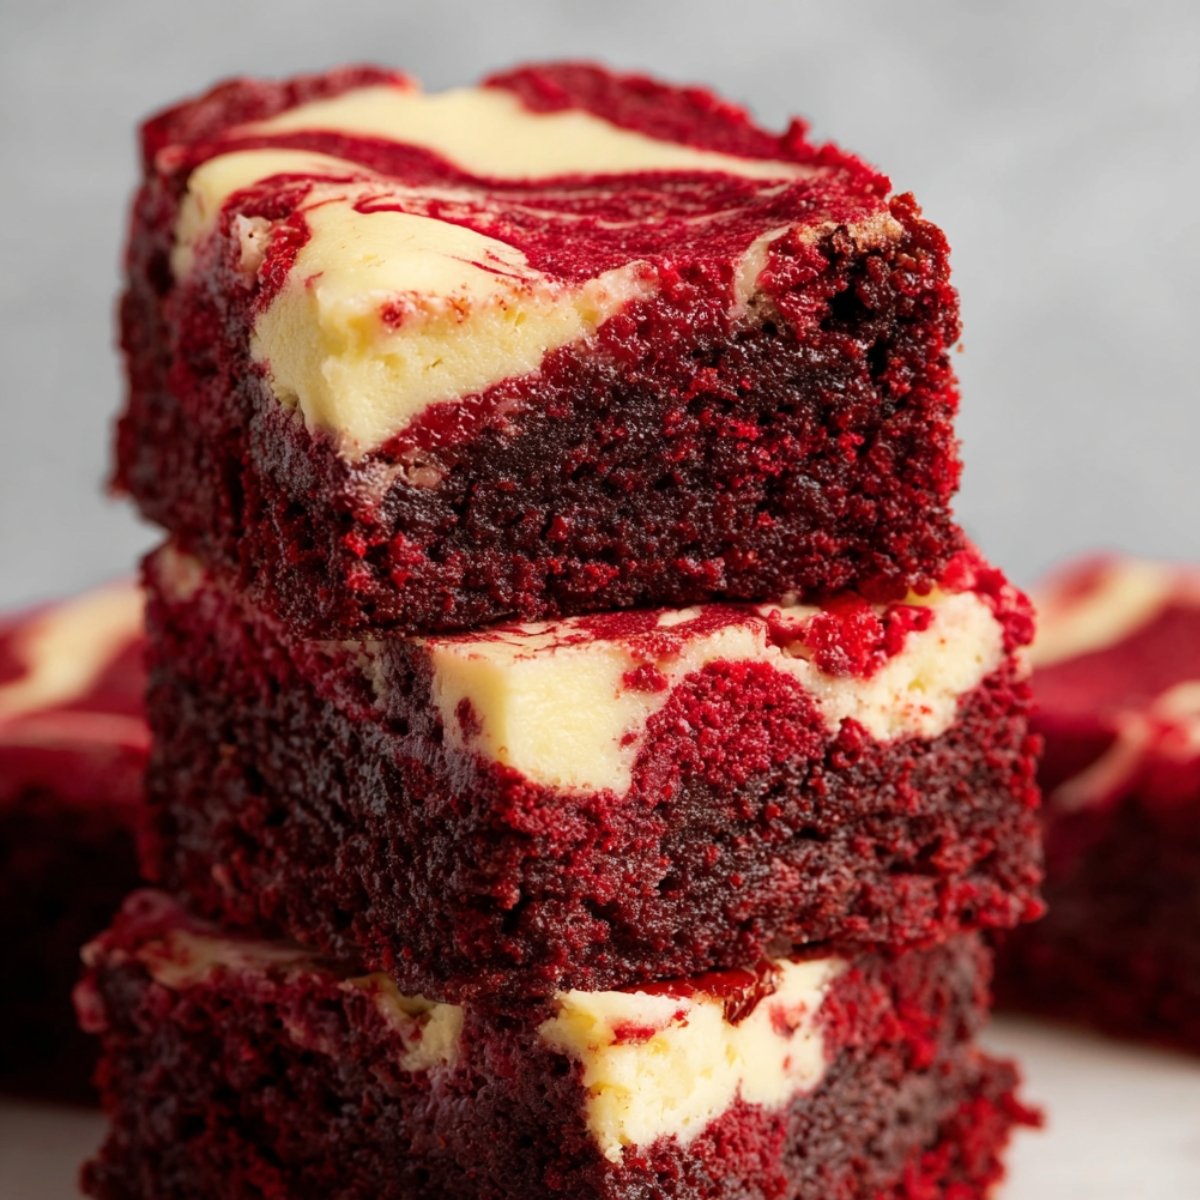
These red velvet brownies have become our go-to dessert when we want something that looks fancy but doesn't require professional baking skills. After years of making regular brownies and wanting to try something different, I figured out how to get that classic red velvet flavor in brownie form without losing the fudgy texture everyone loves. Through countless weekend baking sessions and feedback from Oliver and his sweet-tooth friends, I've got the balance of cocoa, vanilla, and that signature red color down.

Why You'll Love This Red Velvet Brownies
From years of baking for picky eaters and chocolate lovers, these brownies hit that sweet spot between impressive and doable. They're one of those desserts that make people think you're some kind of baking wizard, but honestly, they're not much harder than regular brownies once you know the steps. The red color makes them look special enough for birthdays or holidays, but the flavor is good enough that you'll want to make them just because. Plus, they're way more interesting than plain chocolate brownies without being so fancy that kids won't eat them.
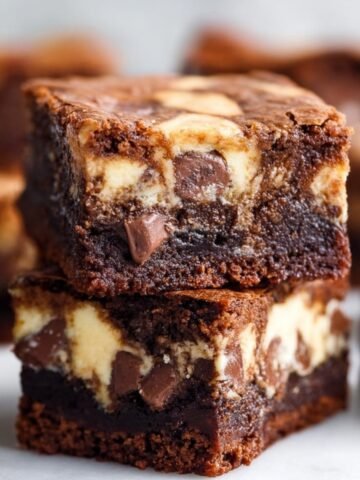
Oliver loves these because they taste like cake and brownies had a baby, and I love them because they actually stay moist for days instead of turning into hockey pucks like some homemade brownies do. The cream cheese swirl on top isn't just for looks - it adds this tangy richness that balances out all the sweetness. They cut into neat squares that look good on a plate, and they're dense enough that one piece actually satisfies you instead of leaving you wanting three more.
Jump to:
- Why You'll Love This Red Velvet Brownies
- Ingredients For Red Velvet Brownies
- Red Velvet Brownies Step by Step Method
- Substitutions
- Storage Tips For Red Velvet Brownies
- Equipment For Red Velvet Brownies
- Tasty Twists on Red Velvet Brownies
- Top Tip
- Why This Red Velvet Brownies Recipe Works
- FAQ
- Sweet Success in Every Square!
- Related
- Pairing
- Red Velvet Brownies
Ingredients For Red Velvet Brownies
The Brownie Base:
- 1 cup all-purpose flour
- ½ cup unsweetened cocoa powder
- 1 ½ cups granulated sugar
- ½ cup melted butter
- 2 large eggs
- ¼ cup vegetable oil
- 2 teaspoons vanilla extract
- 1 tablespoon red food coloring
- 1 teaspoon white vinegar
Cream Cheese Swirl:
- 8 oz cream cheese
- ⅓ cup powdered sugar
- 1 large egg
- 1 teaspoon vanilla extract
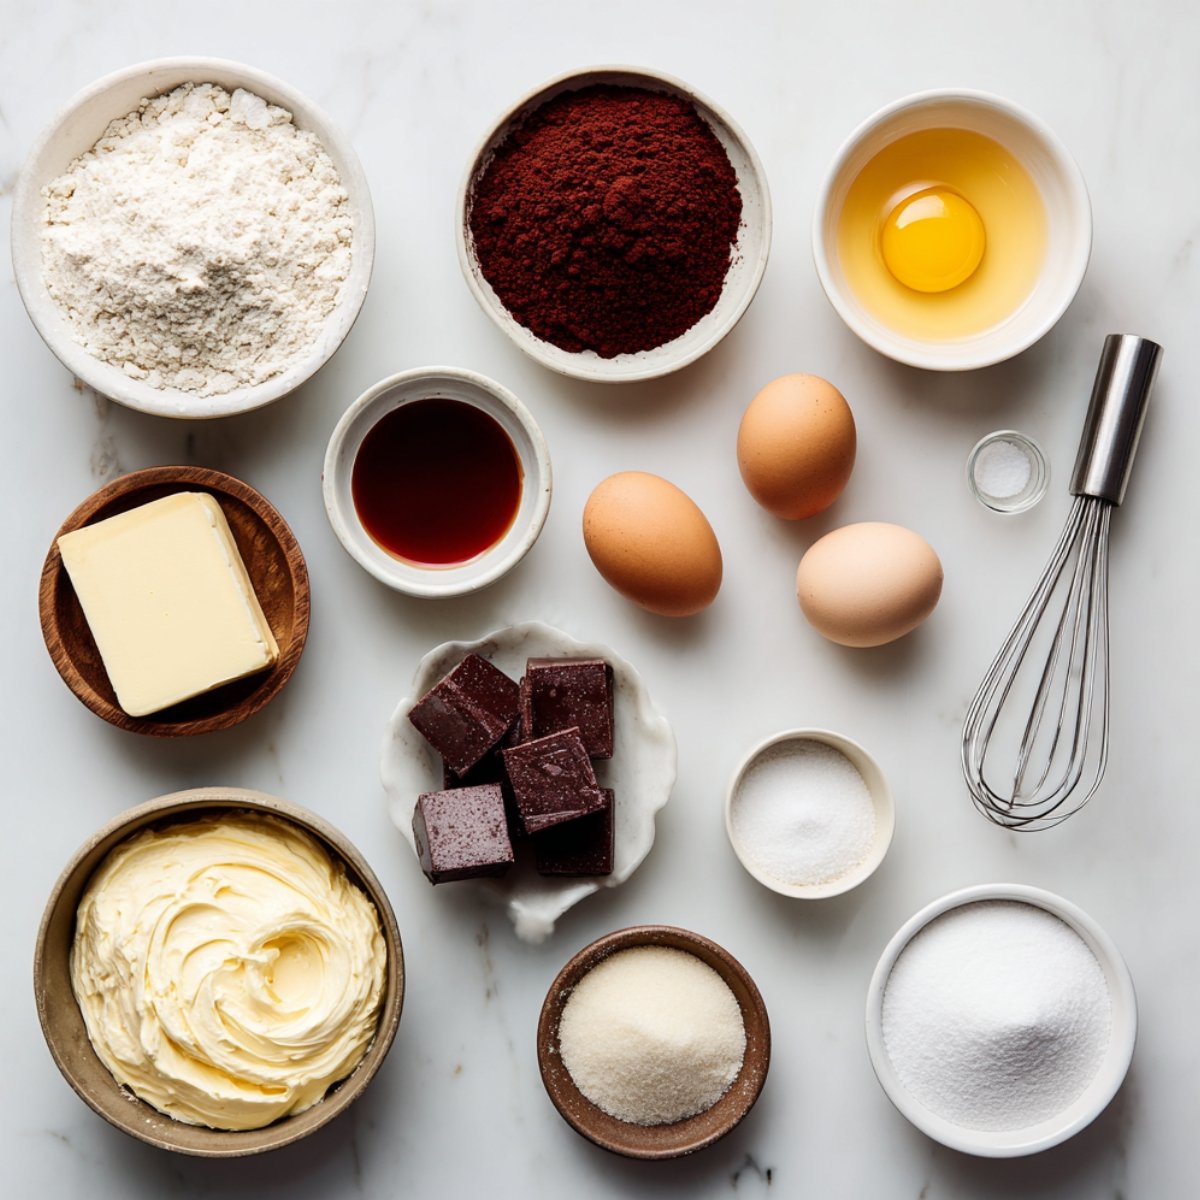
Dry Mix:
- ½ teaspoon salt
- ½ teaspoon baking powder
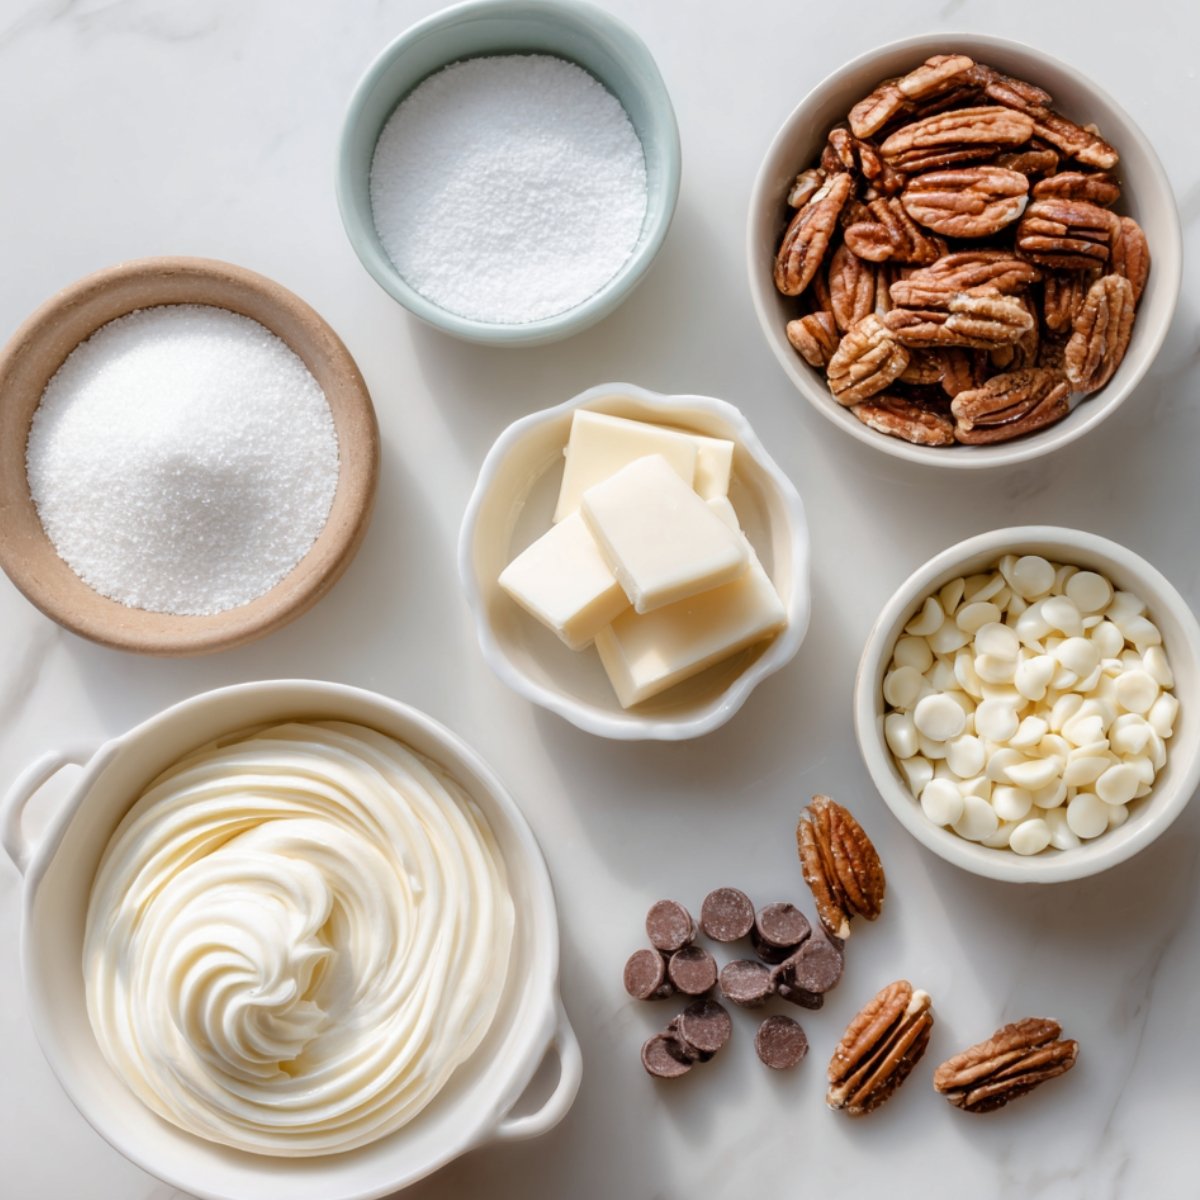
Optional Extras:
- White chocolate chips
- Chopped pecans
- Extra cream cheese frosting for topping
Red Velvet Brownies Step by Step Method
Step 1: Prep and Mix Dry
- Preheat oven to 350°F and line 9x13 pan
- Whisk together flour, cocoa powder, salt, baking powder
- Set dry ingredients aside
- Have all other ingredients ready
Step 2: Make Brownie Batter
- Beat melted butter with sugar until smooth
- Add eggs, oil, vanilla, food coloring, and vinegar
- Mix in dry ingredients until just combined
- Pour batter into prepared pan
Step 3: Make Cream Cheese Layer
- Beat softened cream cheese until smooth
- Add powdered sugar, egg, and vanilla
- Mix until completely smooth
- Drop spoonfuls over brownie batter
Step 4: Create the Swirl
- Use knife to swirl cream cheese through brownie batter
- Make pretty patterns but don't overmix
- Keep swirls visible on top
- Smooth surface gently
Step 5: Bake and Cool
- Bake 28-32 minutes until toothpick has moist crumbs
- Cool completely in pan
- Refrigerate 2 hours before cutting
- Cut with sharp knife for clean squares
Substitutions
From making these for different dietary needs and preferences, these substitutions work great:
Flour Options:
- All-purpose → Gluten-free flour blend
- Regular → Almond flour (use less)
- White → Whole wheat pastry flour
- Standard → Cake flour (lighter texture)
Sugar Switches:
- Granulated → Brown sugar (more moist)
- Regular → Coconut sugar
- White → Sugar substitute
- Standard → Maple syrup (reduce liquid)
Dairy Alternatives:
- Regular cream cheese → Vegan cream cheese
- Butter → Coconut oil (melted)
- Standard → Dairy-free versions
- Fresh → Greek yogurt (for tanginess)
Color Options:
- Red food coloring → Natural beet powder
- Liquid → Gel food coloring (more vibrant)
- Artificial → Natural alternatives
- Regular → Skip for chocolate brownies
Storage Tips For Red Velvet Brownies
Counter Storage (2 days):
- Cover tightly with plastic wrap
- Keep in cool, dry place
- Don't stack until completely cool
- Best texture at room temperature
Fridge Storage (1 week):
- Store in airtight container
- Layer between parchment paper
- Bring to room temperature before serving
- Cream cheese layer stays fresh longer
Freezer Storage (3 months):
- Wrap individual squares in plastic
- Store in freezer bags
- Label with date
- Thaw at room temperature
Cutting Tips:
- Always cool completely first
- Refrigerate 2 hours for cleanest cuts
- Clean knife between cuts
- Use gentle sawing motion
Equipment For Red Velvet Brownies
- 9x13 inch baking pan
- Electric mixer (hand or stand)
- Large mixing bowls
- Measuring cups and spoons
- Rubber spatula
- Sharp knife for cutting
Tasty Twists on Red Velvet Brownies
Cheesecake Style:
- Double the cream cheese layer
- Add graham cracker crust bottom
- Extra vanilla in cheese layer
- Chill overnight before serving
White Chocolate Version:
- Fold in white chocolate chips
- Drizzle melted white chocolate on top
- Add white chocolate to cream cheese layer
- Perfect for special occasions
Oreo Twist:
- Crush Oreos into brownie batter
- Add cookies to cream cheese swirl
- Top with more crushed cookies
- Kids absolutely love this version
Holiday Special:
- Add red and green sprinkles
- Use holiday-themed cookie cutters
- Pipe cream cheese frosting on top
- Perfect for Christmas parties
Nutty Delight:
- Fold in chopped pecans
- Add walnuts to cream cheese layer
- Toast nuts first for better flavor
- Sprinkle extra nuts on top
Top Tip
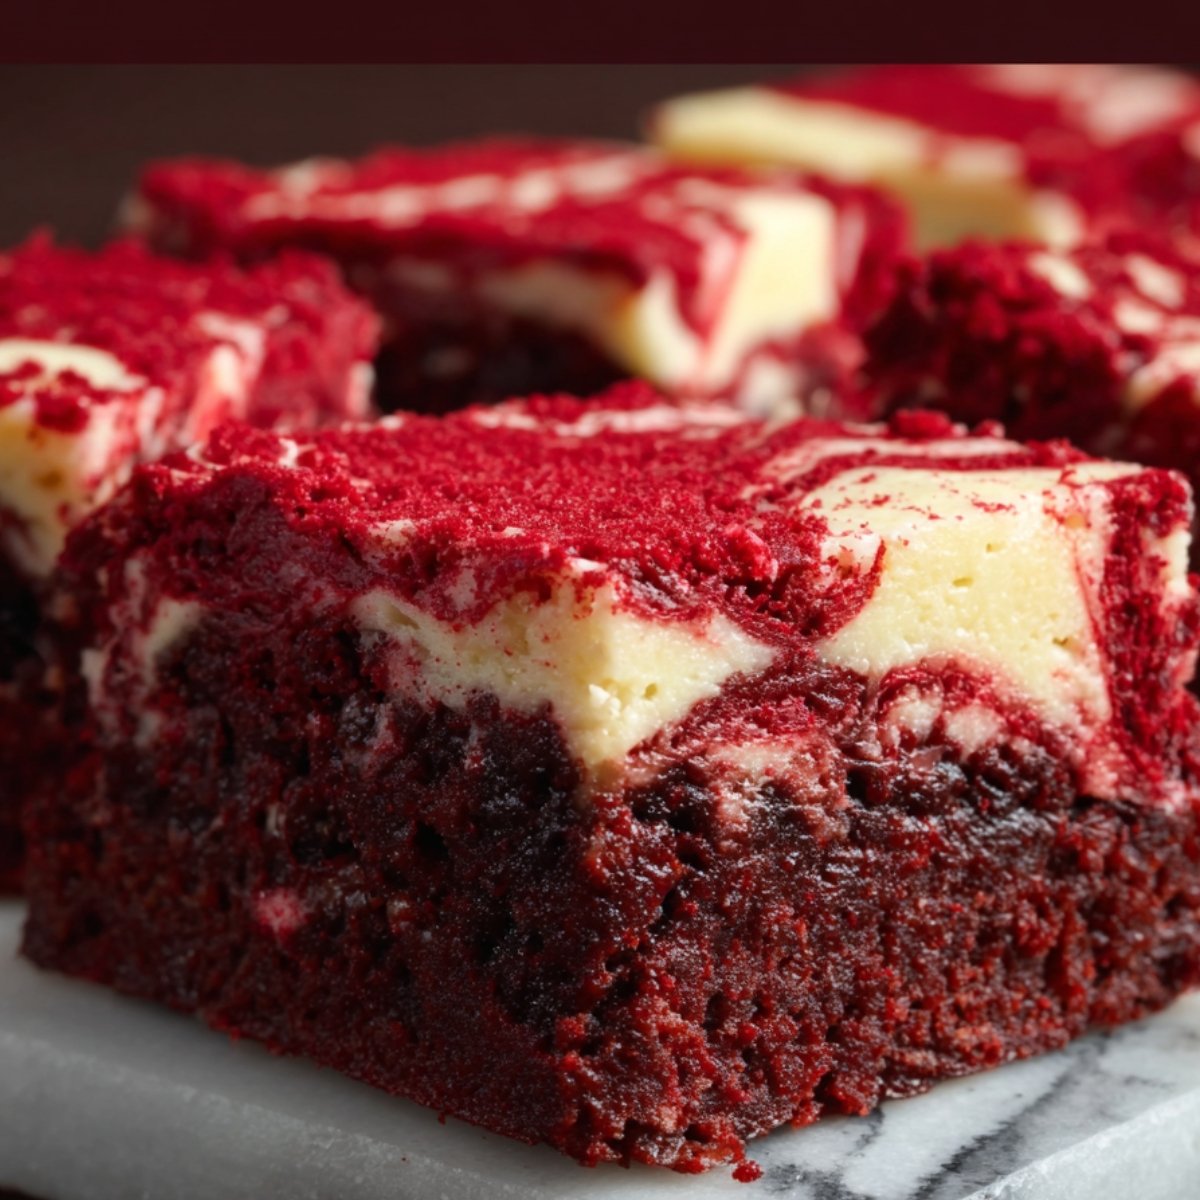
- These red velvet brownies actually taste better the day after you make them - all the flavors have time to meld together and the texture gets even more fudgy. What I do is make them the night before any party or gathering, then cut them the next day. The cream cheese layer sets up better overnight, and the brownie part gets that chewy texture that's not too soft and not too firm.
- The key is storing them right after they cool completely. I cover the whole pan with plastic wrap and leave it on the counter overnight, then move it to the fridge in the morning if it's going to be a hot day. This way they don't get condensation on top from going straight into the fridge while warm, but they stay fresh and don't dry out either.
- Oliver figured out that cold red velvet brownies straight from the fridge are actually pretty good too - the cream cheese layer gets firm and tastes almost like cheesecake. Now he likes them both ways, which works out great because I can make them ahead and he'll eat them however they are.
Why This Red Velvet Brownies Recipe Works
After years of making these and watching people mess up other brownie recipes, I figured out exactly why this method works when others don't. The combination of butter and oil gives you the best of both worlds - butter for flavor and oil for moisture that lasts for days. Most brownie recipes use just one or the other, but using both keeps these from turning into dry squares that nobody wants to eat. The vinegar might seem weird, but it reacts with the cocoa powder to give you that classic red velvet tang and helps the red color stay bright instead of turning muddy brown.
The cream cheese layer isn't just for looks either - it adds moisture and richness that balances out the cocoa. But the real trick is not overbaking them. Most people think brownies are done when a toothpick comes out completely clean, but that's how you get hockey pucks. These red velvet brownies are good when the toothpick has a few moist crumbs on it - they'll finish cooking while they cool and stay fudgy instead of turning into cake. The overnight cooling thing works because it gives the cream cheese time to set up right and lets all the flavors meld together into something way better than the sum of its parts.
FAQ
How to make quick easy brownies?
The quickest way is using a box mix, but these red velvet brownies from scratch only take about 15 minutes of actual mixing time. The key is having all your ingredients at room temperature and using an electric mixer for the cream cheese layer - makes everything come together fast.
What are the 5 ingredient brownies?
Basic brownies can be made with just flour, sugar, eggs, butter, and cocoa powder. But these red velvet brownies need a few more ingredients like food coloring and vinegar to get that classic flavor and color that makes them special.
How to make brownies with three ingredients?
You can make simple brownies with just a box of cake mix, eggs, and oil. But for red velvet brownies, you really need the full ingredient list to get that tangy flavor and rich red color that makes them different from regular chocolate brownies.
What is the secret to making brownies more moist?
Don't overbake them - they should still have moist crumbs on a toothpick when you take them out. Also, using both butter and oil helps keep them fudgy. For these red velvet brownies, the cream cheese layer adds extra moisture that keeps them soft for days.
Sweet Success in Every Square!
What I love most about this Red Velvet Brownies Recipe is how it bridges the gap between impressive and doable. There's something about red velvet that just feels fancy, maybe because of that deep red color or the cream cheese layer that makes them look professional. But once you've made them a few times, you realize they're really just brownies with a few extra steps. Oliver's friends always get excited when they see these cooling on the counter, and honestly, it makes me feel pretty good that our homemade version gets them more excited than store-bought treats.
Want to round out your easy recipe collection? Try our Healthy Sheet Pan Pancakes ready in 20 minutes for weekend mornings when you want breakfast to feel special without the hassle. For dinner, our Philly Cheesesteak Bowl Recipe gives you all those classic flavors in a healthier format that's just as satisfying. And when you need a quick lunch that feels fancy, our Easy Chicken Avocado Melt Sandwich delivers restaurant quality without leaving the house.
Share your Red Velvet Brownies success! We love seeing your baking creations and hearing about your own flavor twists!
⭐️⭐️⭐️⭐️⭐️ Rate this Red Velvet Brownies Recipe and join our baking community!
Related
Looking for other recipes like this? Try these:

Pairing
These are my favorite dishes to serve with Red Velvet Brownies


Red Velvet Brownies
Equipment
- 1 9x13 inch baking pan (Lined with parchment or greased)
- 1 Electric mixer (Hand or stand mixer)
- 2 Mixing bowls (Large and medium sizes)
- 1 Rubber spatula (For folding and spreading)
- 1 Measuring cups/spoons (Standard set)
- 1 Sharp knife (For clean cutting after chilling)
Ingredients
Brownie Base:
- 1 cup all-purpose flour
- ½ cup unsweetened cocoa powder
- 1 ½ cups granulated sugar
- ½ cup butter - Melted
- 2 eggs - Large
- ¼ cup vegetable oil
- 2 teaspoon vanilla extract
- 1 tablespoon red food coloring
- 1 teaspoon white vinegar
- ½ teaspoon salt
- ½ teaspoon baking powder
Cream Cheese Swirl:
- 8 oz cream cheese - Softened
- ⅓ cup powdered sugar
- 1 egg - Large
- 1 teaspoon vanilla extract
Optional Extras:
- ½ cup white chocolate chips - Optional
- ½ cup chopped pecans - Optional
- extra cream cheese frosting - For topping
Instructions
- Preheat oven, line pan, and whisk together flour, cocoa powder, salt, and baking powder.
- Mix melted butter and sugar, add eggs, oil, vanilla, red coloring, vinegar, then dry mix.
- Cheese Layer Beat cream cheese, mix in powdered sugar, egg, and vanilla until smooth.
- Spoon cream cheese mix over batter and swirl with a knife without overmixing.
- Bake for 28-32 mins, cool completely, then chill 2 hrs before cutting clean squares.
Leave a Reply