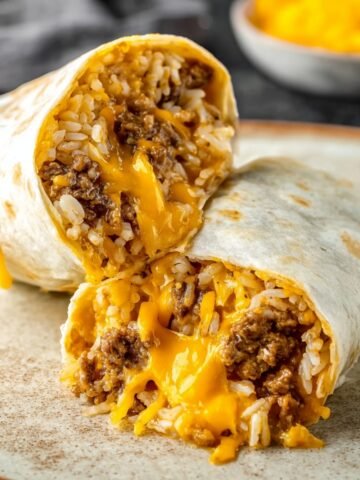
Two weeks ago, Oliver came home from his friend's house raving about these "amazing taco things that look like breadsticks." After fifteen years of creating family-friendly recipes and countless kitchen experiments, I knew I had to figure out how to make cheesy taco sticks at home. This recipe comes from testing different dough options, perfecting the cheese-to-beef ratio, and finding the exact baking method that creates crispy outsides with gooey, melty centers that kids absolutely love.


Why You'll Love This Cheesy Taco Sticks
From years of making after-school snacks and testing recipes on hungry kids (including Oliver's entire soccer team), I can tell you exactly why these cheesy taco sticks never fail. The secret is in the perfect balance of seasoned ground beef, melted cheese, and that crispy-on-the-outside, soft-on-the-inside texture that makes them so good. Oliver's friends now ask if we're making "those taco stick things" every time they come over, and after making over 100 batches for various events, I've never had a single leftover.
What makes these taco sticks really special is how they solve the biggest taco problem - the mess. No more filling falling out or shells breaking in half. These handheld treats contain all the good stuff inside a perfectly golden wrapper that kids can actually eat without needing a cleanup crew afterward. Plus, they're completely customizable so even the pickiest eaters can find a version they love.
Jump to:
- Why You'll Love This Cheesy Taco Sticks
- Cheesy Taco Sticks Ingredients
- How To Make Cheesy Taco Sticks
- Substitutions
- Storage Tips For Cheesy Taco Sticks
- Equipment For Cheesy Taco Sticks
- Cheesy Taco Sticks Variations
- Why This Cheesy Taco Sticks Works
- Top Tip
- What to Serve With Cheesy Taco Sticks
- FAQ
- Ready for Taco Stick Success!
- Related
- Pairing
- Cheesy Taco Sticks
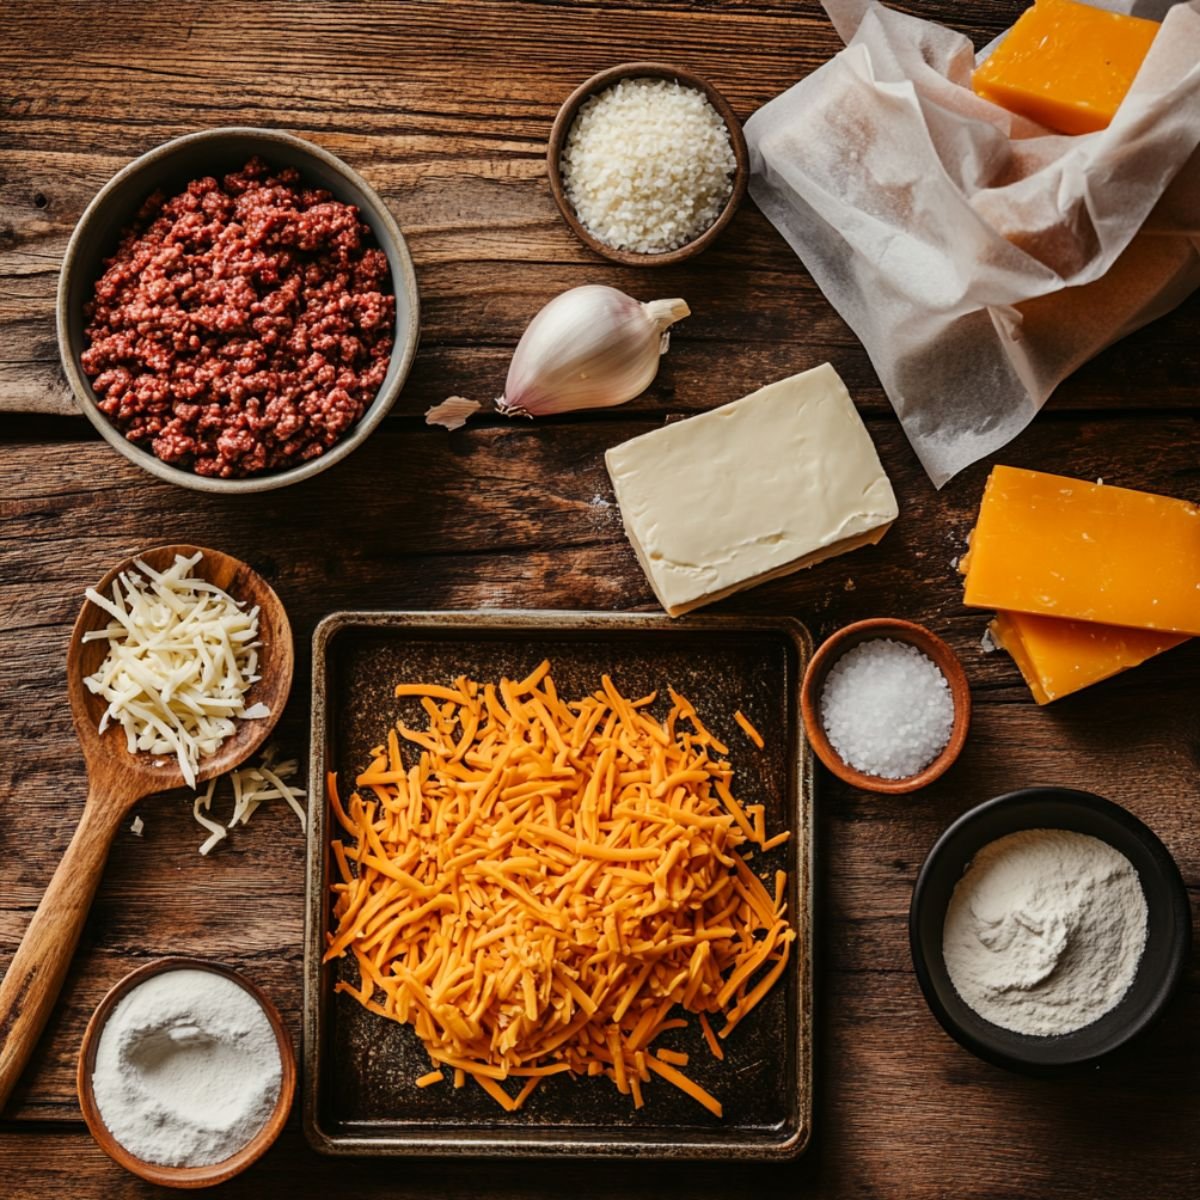
Cheesy Taco Sticks Ingredients
The Filling:
- Ground beef
- Taco seasoning packet
- Shredded Mexican cheese blend
- Cream cheese
- Diced onion
- Garlic powder
- Salt and pepper
The Wrapper:
- Crescent roll dough
- Egg wash for brushing
- Sesame seeds
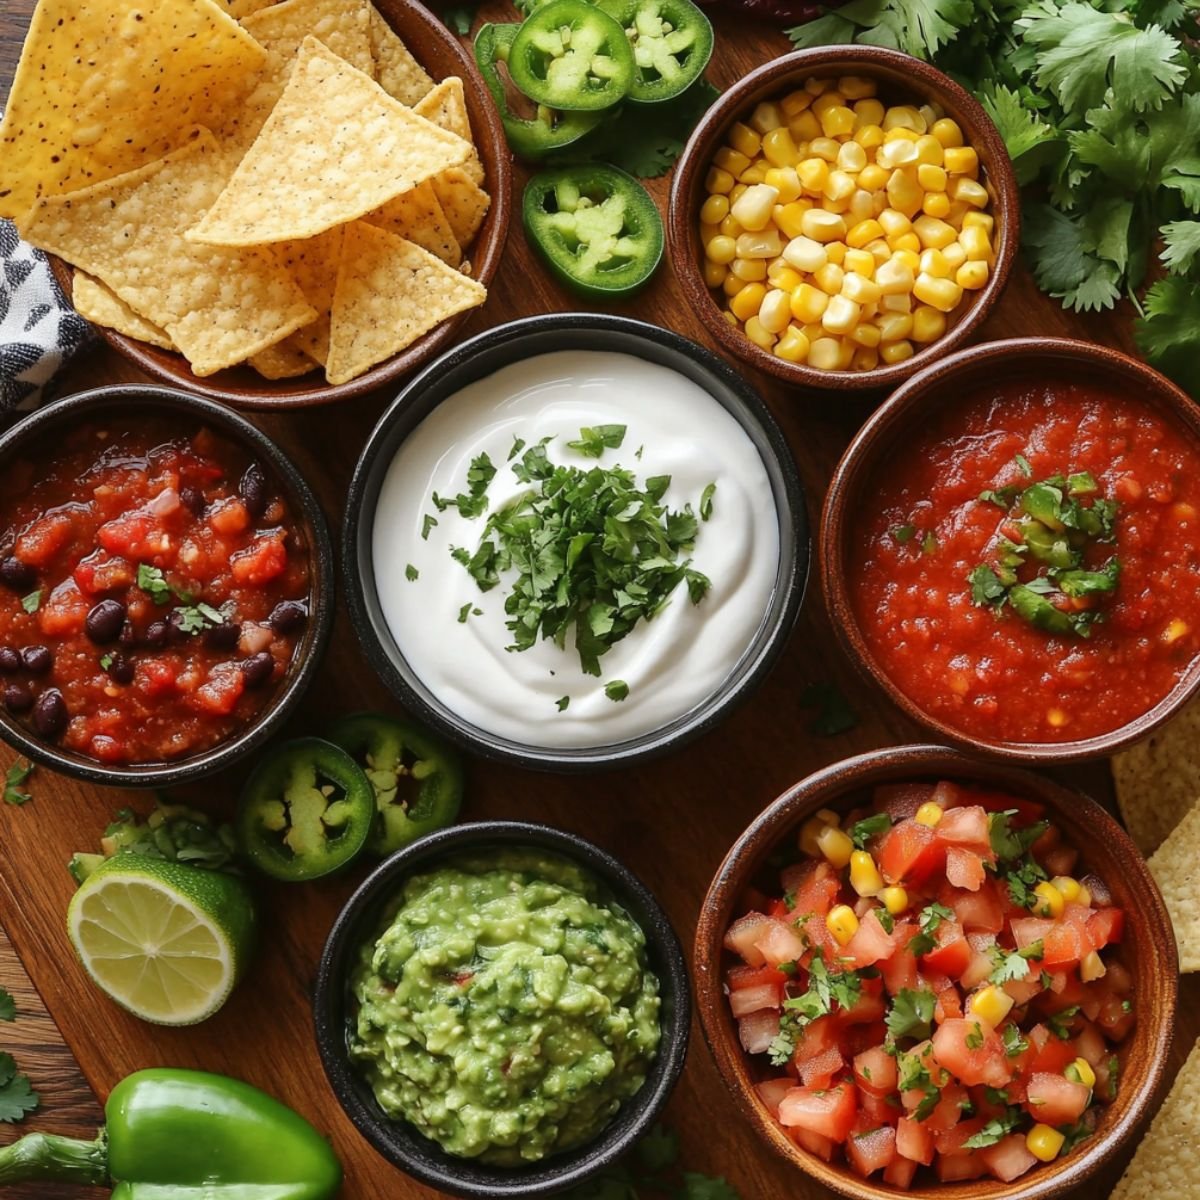
For Dipping:
- Salsa
- Sour cream
- Guacamole
- Ranch dressing
Optional Add-ins:
- Diced jalapeños
- Black beans
- Corn kernels
- Green chiles
See recipe card for quantities.
How To Make Cheesy Taco Sticks
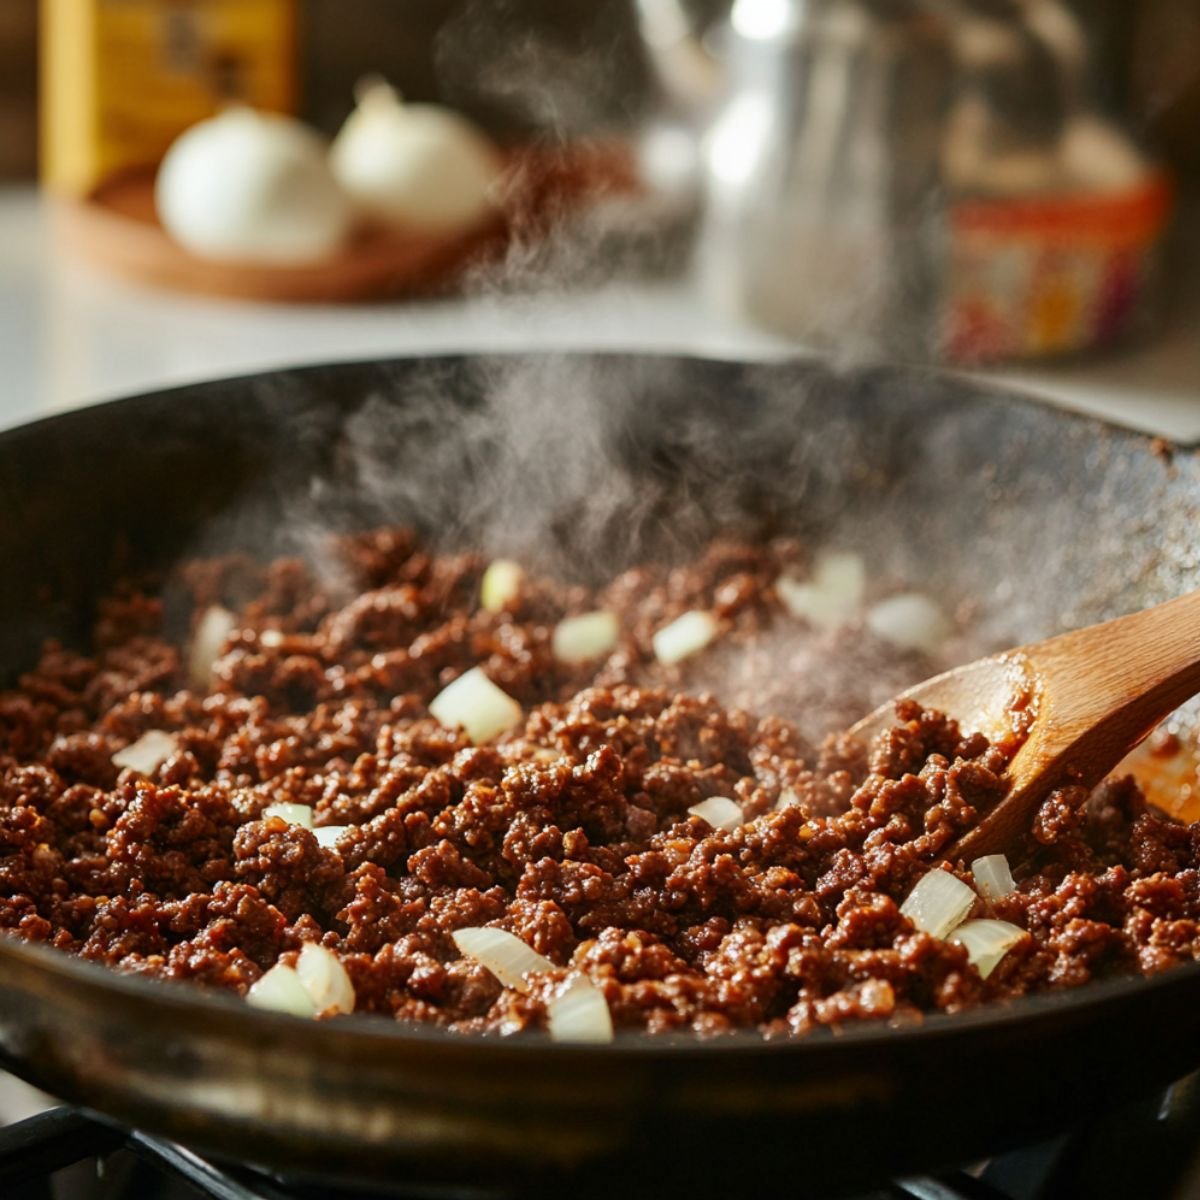
Cook the Filling:
- Brown ground beef in large skillet
- Add diced onion and cook until soft
- Season with taco seasoning packet
- Let mixture cool completely
Prepare the Assembly:
- Unroll crescent roll dough
- Separate into triangles
- Mix softened cream cheese with shredded cheese
- Have egg wash ready for brushing
Assembly Time:
- Spread cheese mixture on wide end of triangle
- Add spoonful of beef mixture
- Roll from wide end to narrow point
- Pinch edges to seal completely
Baking Process:
- Place on lined baking sheet
- Brush tops with egg wash
- Sprinkle with sesame seeds if using
- Bake at 375°F for 12-15 minutes until golden

Substitutions
From making these for families with different dietary needs, these substitutions work beautifully:
Protein Options:
- Ground turkey → Ground beef
- Ground chicken → Traditional beef
- Black beans → Meat filling
- Shredded chicken → Ground beef
Dough Alternatives:
- Pizza dough → Crescent rolls
- Puff pastry → Regular dough
- Tortillas → Crescent dough
- Biscuit dough → Crescent rolls
Cheese Changes:
- Cheddar → Mexican blend
- Pepper jack → Regular cheese
- Dairy-free cheese → Traditional
- Mozzarella → Mexican mix
Spice Level Adjustments:
- Mild taco seasoning → Regular
- Add jalapeños → Keep mild
- Chipotle powder → Regular spices
- Hot sauce → Mild version
Healthier Options:
- Whole wheat dough → Regular
- Greek yogurt → Cream cheese
- Low-fat cheese → Regular
- Lean ground beef → 80/20
Storage Tips For Cheesy Taco Sticks
Counter Storage (2-3 days):
- Cool completely before storing
- Airtight container works best
- Layer with parchment paper
- Room temperature only
Refrigerator Tips (4-5 days):
- Wrap individually in foil
- Store in sealed container
- Reheat before eating
- Great for lunch boxes
Freezer Magic (2-3 months):
- Cool completely first
- Wrap each stick in plastic wrap
- Place in freezer bags
- Label with date clearly
Reheating Methods:
- Oven: 350°F for 8-10 minutes
- Air fryer: 350°F for 5-6 minutes
- Microwave: 30-45 seconds (not as crispy)
- Toaster oven: 350°F for 6-8 minutes
Equipment For Cheesy Taco Sticks
- Large skillet
- Baking sheet
- Parchment paper
- Pastry brush
- Sharp knife
- Mixing bowls
Cheesy Taco Sticks Variations
Pizza Taco Fusion:
- Add marinara sauce to filling
- Use mozzarella cheese
- Sprinkle Italian seasoning
- Serve with pizza sauce for dipping
Breakfast Version:
- Scrambled eggs instead of beef
- Breakfast sausage crumbles
- Cheddar cheese
- Hash brown bits
Veggie-Packed:
- Black beans and corn
- Diced bell peppers
- Shredded lettuce after baking
- Extra cheese for binding
Spicy Kick:
- Diced jalapeños in filling
- Pepper jack cheese
- Chipotle seasoning
- Hot sauce mixed in
Air Fryer Style:
- Cook at 350°F for 8-10 minutes
- Flip halfway through
- Brush with oil for crispiness
- Perfect for smaller batches
Why This Cheesy Taco Sticks Works
From years of making after-school snacks and testing recipes on hungry kids (including Oliver's entire soccer team), I can tell you exactly why these cheesy taco sticks never fail. The secret is in the perfect balance of seasoned ground beef, melted cheese, and that crispy-on-the-outside, soft-on-the-inside texture that makes them so good. Oliver's friends now ask if we're making "those taco stick things" every time they come over, and after making over 100 batches for various events, I've never had a single leftover.
What makes these taco sticks really special is how they solve the biggest taco problem - the mess. No more filling falling out or shells breaking in half. These handheld treats contain all the good stuff inside a perfectly golden wrapper that kids can actually eat without needing a cleanup crew afterward. Plus, they're completely customizable so even the pickiest eaters can find a version they love.
Top Tip
- Last fall, Oliver was complaining that his lunch got boring by Wednesday, so we started trying different ways to pack these cheesy taco sticks. One morning, I was rushing and accidentally grabbed the wrong container - one with a small compartment for ranch dressing that I'd forgotten about.
- That tiny discovery changed everything for us. Now we pack them cold on purpose with little containers of different dipping sauces - ranch, salsa, even leftover queso from taco night. The other kids at school started asking Oliver what he was eating, and pretty soon half his class was begging their parents to make "those stick things that Oliver brings."
- But our biggest breakthrough came when Oliver suggested we make them smaller and pack them as "taco bites" instead of full sticks. We started cutting the dough into smaller pieces and making mini versions that fit perfectly in his lunch container. They're easier to eat, cook faster, and somehow taste even better in bite-sized form.
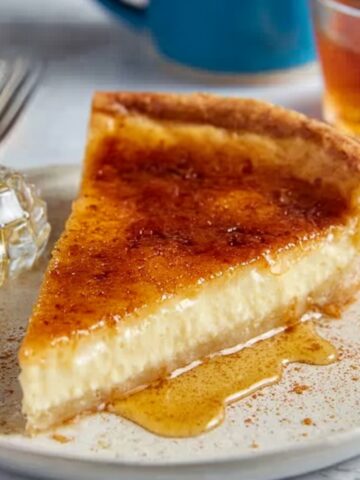
What to Serve With Cheesy Taco Sticks
https://iwashyoudry.com/cheesy-taco-sticks/From years of making these for family dinners and party spreads, here's what works best with these taco sticks. The classic approach is to serve them with a variety of dipping sauces - salsa, sour cream, and guacamole are the traditional choices that everyone loves. Ranch dressing has become Oliver's favorite after his lunch box discovery, and it's surprisingly good with the taco flavors. For parties, I like to set up a little dipping station with different sauces so everyone can try their favorites.
When we're serving these as a main dish for dinner, they pair perfectly with simple sides that don't fight for attention. A fresh garden salad with lime vinaigrette cuts through the richness nicely, while Mexican rice or cilantro lime rice makes it feel like a complete meal. Roasted corn with chili powder and lime is another family favorite that brings out the Tex-Mex theme.
FAQ
How do I store leftovers?
Store leftover cheesy taco sticks in an airtight container in the refrigerator for up to 4-5 days. They're actually great cold for lunch boxes, or you can reheat them in the oven at 350°F for 8-10 minutes to get them crispy again.
Can I freeze these taco sticks?
Yes! These freeze beautifully for up to 3 months. Cool them completely, wrap individually in plastic wrap, then store in freezer bags. You can bake them straight from frozen - just add 3-4 extra minutes to the cooking time.
What's the best way to reheat these taco sticks?
The oven or air fryer gives the best results for reheating. Use 350°F for 8-10 minutes in the oven or 5-6 minutes in the air fryer. The microwave works too but they won't be as crispy - just 30-45 seconds is enough.
How can I make these taco sticks spicier?
Add diced jalapeños to the beef mixture, use pepper jack cheese instead of regular, or mix some hot sauce into the cream cheese. You can also serve them with spicy salsa or chipotle ranch for dipping.
Ready for Taco Stick Success!
Now you have all the secrets to make perfect cheesy taco sticks - from proper sealing techniques to Oliver's lunch box discovery that made these a school sensation. These handheld treats prove that sometimes the best family favorites come from taking classic flavors and making them more fun and kid-friendly.
Want more family-friendly dinners that everyone will love? Try our Easy Creamy Beef and Shells that comes together in one pot for minimal cleanup. Looking for another crowd-pleasing casserole? Our Easy Chicken Enchilada Casserole delivers all the flavors of Mexican night in an easy baking dish. Need a perfect side for your next gathering? Our Best Tortellini Pasta Salad Recipe travels well and feeds a crowd!
Share your Cheesy Taco Sticks success! We love seeing your family creations and hearing about your own kitchen discoveries!
Rate this Cheesy Taco Sticks and join our cooking community!
Related
Looking for other recipes like this? Try these:


Pairing
These are my favorite dishes to serve with Cheesy Taco Sticks


Cheesy Taco Sticks
Equipment
- Large skillet (For browning ground beef)
- Baking sheet (Lined with parchment paper)
- Pastry brush (For brushing egg wash)
- Mixing bowl (To mix cream cheese and cheese)
- Sharp knife (Optional, for trimming dough)
- Spoon (For adding filling)
Ingredients
- 1 lb Ground beef - Lean or 80/20
- 1 packet Taco seasoning - Use mild or spicy
- ½ cup Diced onion - Yellow or white
- 1 teaspoon Garlic powder
- Salt and pepper - To taste
- 4 oz Cream cheese - Softened
- 1 cup Shredded Mexican cheese blend
- 1 can Crescent roll dough - 8 triangles
- 1 Egg - Beaten for egg wash
- 1 tablespoon Sesame seeds - Optional, for topping
Optional Add-ins
- 2 tablespoon Diced jalapeños - For spice
- ¼ cup Black beans - Drained
- ¼ cup Corn kernels - Frozen or canned
- 2 tablespoon Diced green chiles - Mild or hot
Instructions
- Brown the ground beef with onions and seasoning
- Prepare the crescent dough and mix the cheeses
- Fill each dough triangle and roll into sticks
- Bake the taco sticks until golden and crisp
- Let cool slightly and serve with dips


Leave a Reply