These salmon rice balls have saved countless lunchboxes in our house! After years of trying to perfect this Japanese classic, I've finally created a version that stays together, tastes amazing, and gets enthusiastic thumbs-up from even the pickiest eaters. The secret? Getting the rice texture just right and balancing the salmon seasoning so it's flavorful but still kid-friendly. Max now requests these weekly and loves helping shape them into perfect triangles.


Why You'll Love This Recipe
After testing these salmon rice balls on dozens of picky eaters (including Max's entire soccer team!), I've discovered why they're such a hit with families everywhere. They strike that perfect balance of being nutritious enough for parents to feel good about serving them, yet tasty enough that kids actually get excited when they appear in their lunchbox. The portable nature makes them ideal for busy days, while their make-ahead friendly quality saves precious morning time - just grab and go!
What makes these extra special is their versatility. Need a quick dinner? Pair them with miso soup. Packing lunches? They're perfect at room temperature. Having friends over? Cut them into bite-sized pieces for adorable appetizers. Plus, they're surprisingly budget-friendly, especially when made with leftover salmon from another meal. In our house, they've become the solution to "I don't know what to pack for lunch" dilemmas that seem to happen every other morning.
Jump to:
Salmon Rice Balls Ingredients
Rice Base:
- Short-grain Japanese rice
- Rice vinegar
- Sugar
- Salt
- Sesame seeds

Salmon Filling:
- Fresh or canned salmon
- Mayonnaise
- Soy sauce
- Green onions
- Sriracha (optional)
Wrapping:
- Nori sheets
- Sesame seeds
- Rice seasonings
See recipe card for quantities.

How To Make Salmon Rice Balls
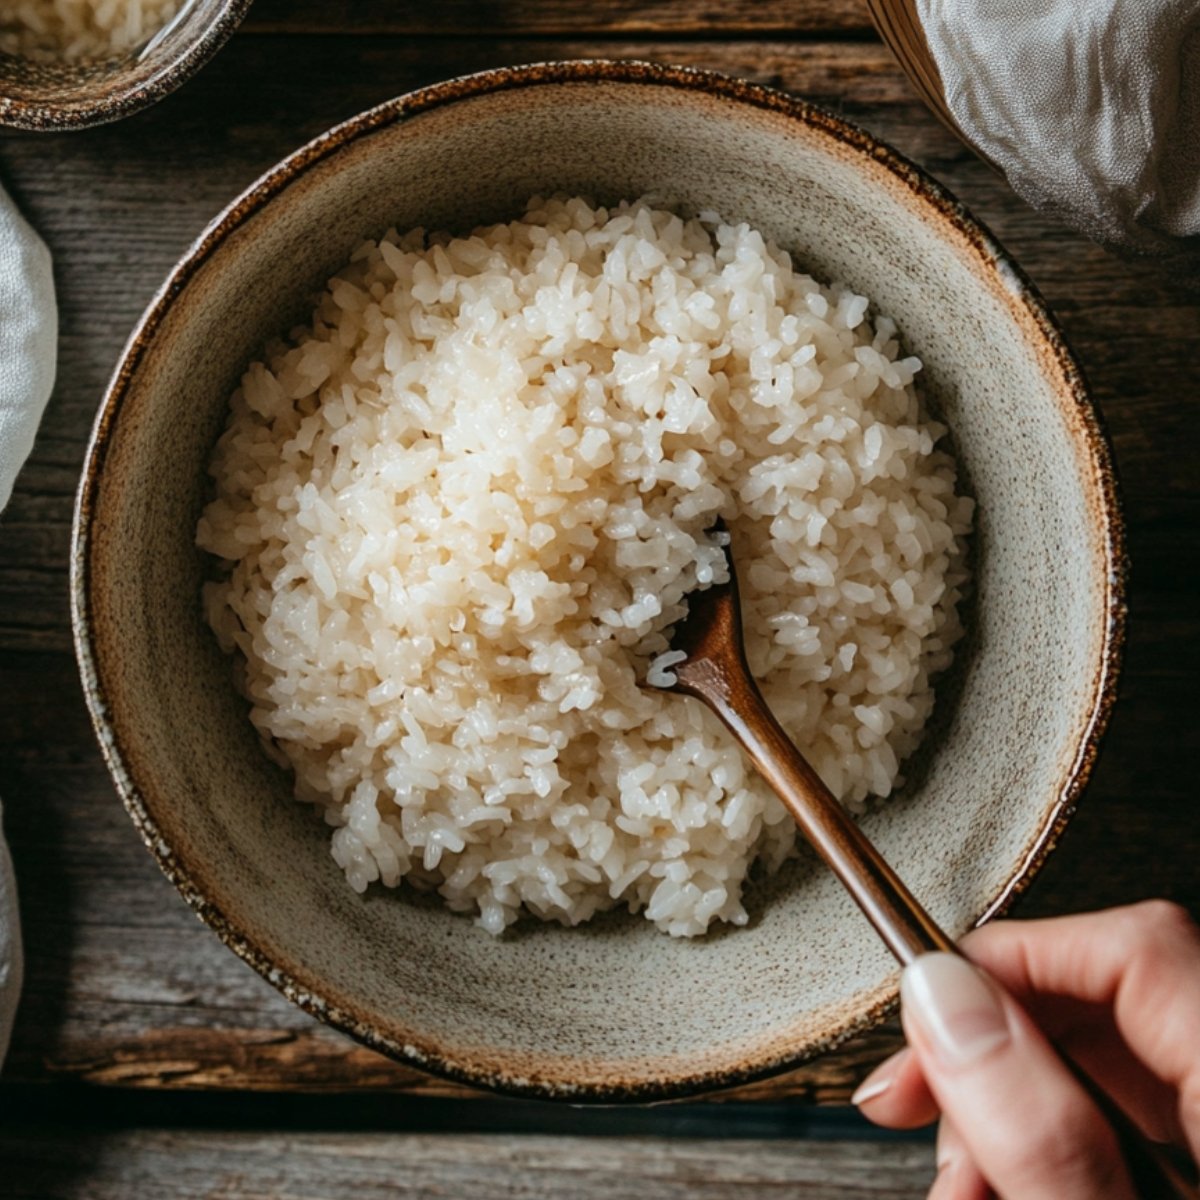
Rice Preparation:
- Cook rice according to package
- Cool slightly (still warm)
- Mix with vinegar mixture
- Rest 10 minutes covered
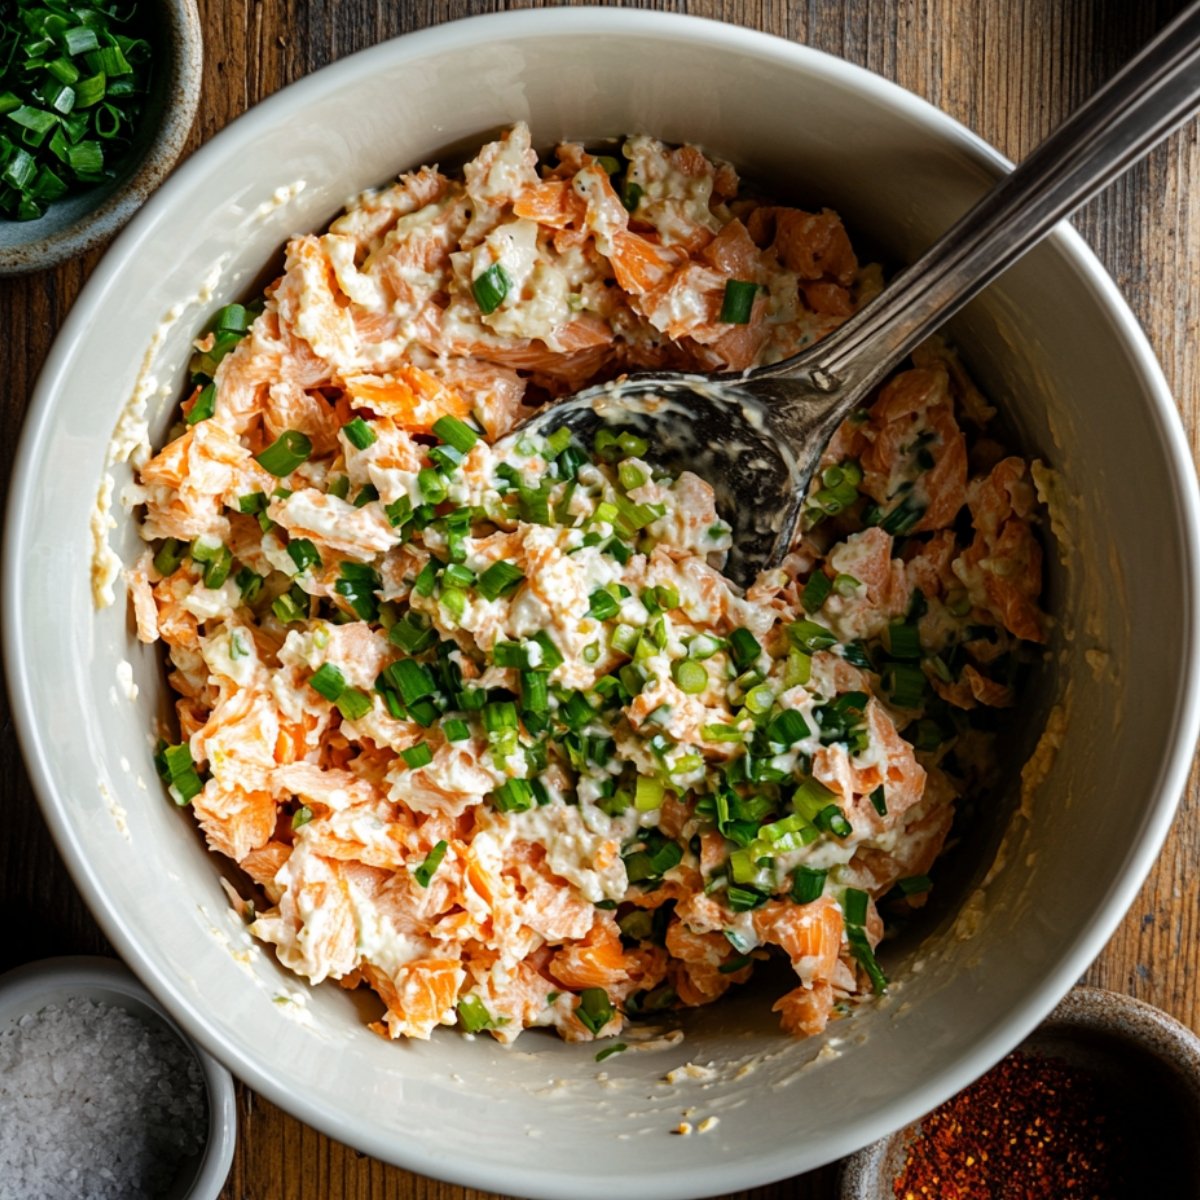
Salmon Filling:
- Flake salmon completely
- Mix with seasonings
- Taste and adjust
- Keep chilled until needed
Shaping Magic:
- Wet hands with salt water
- Take ⅓ cup rice
- Make indentation
- Add salmon filling
- Fold rice around filling
- Shape into triangle
- Press firmly but gently
Nori Wrapping:
- Cut nori into strips
- Wrap around bottom
- Dampen end to seal
- Add sesame seeds
- Serve immediately or wrap
Substitutions
Rice Options:
- Japanese short-grain → Medium-grain Calrose rice
- White rice → Brown rice blend (use 3:1 ratio)
- Traditional → Cauliflower rice mix (add egg binder)
- Standard → Quinoa blend (stickier texture)
Protein Choices:
- Fresh salmon → Canned salmon (drain thoroughly)
- Regular → Smoked salmon (reduce added salt)
- Salmon → Quality canned tuna
- Traditional → Seasoned tofu crumbles (vegetarian)
Binding Alternatives:
- Mayo → Greek yogurt (tangier taste)
- Regular → Avocado mayo (dairy-free)
- Standard → Cream cheese (richer flavor)
- Classic → Mashed avocado (healthier option)
Wrapper Swaps:
- Nori sheets → Soy wrappers (milder flavor)
- Traditional → Lettuce leaves (fresh crunch)
- Regular → Rice paper (softer texture)
- Standard → No wrapper (roll in sesame seeds)
Salmon Rice Balls Variations
Crispy Delights:
- Roll in panko breadcrumbs
- Quick shallow fry until golden
- Serve with spicy mayo dip
- Extra crunchy texture
Teriyaki Style:
- Mix teriyaki sauce into salmon
- Brush outside with glaze
- Sprinkle with toasted sesame
- Sweet-savory flavor profile
Cheesy Surprise:
- Tuck small cheese cube inside
- Try cream cheese or mild cheddar
- Creates melty center
- Kids' absolute favorite
California Roll:
- Add avocado chunks
- Mix in cucumber pieces
- Drizzle with Kewpie mayo
- Sushi-inspired flavors
Equipment For Salmon Rice Balls
- Rice cooker or heavy pot
- Rice paddle (not metal spoon)
- Small bowl for salt water
- Plastic wrap for shaping
- Sharp knife for nori
Storage Stip
Counter Storage (4 hours):
- Wrap individually in plastic
- Keep at room temperature
- Away from direct sunlight
- Best eaten same day
Refrigerator Tips (2 days):
- Store in airtight container
- Keep nori separate if possible
- Microwave 20 seconds to revive
- Rewrap with fresh nori
Freezer Method (1 month):
- Freeze without nori wrapper
- Wrap each ball individually
- Thaw in refrigerator overnight
- Add fresh nori before serving
Lunchbox Strategy:
- Wrap in plastic then foil
- Include ice pack for safety
- Pack nori separately if possible
- Include dipping sauce container
Top Tip
After countless batches of salmon rice balls that either fell apart or stuck stubbornly to my hands (including one memorable disaster where half our dinner ended up glued to my fingers instead of on our plates), I finally discovered the professional secret that transformed our results: temperature contrast is the key to perfect rice balls! Keep your rice warm (but not hot) while working, but maintain ice-cold hands throughout the shaping process.
Before forming each rice ball, I now rinse my hands under cold water for 10-15 seconds, then quickly dip my fingertips in the salt water solution I keep in a small bowl nearby. This temperature difference creates the perfect conditions - the warm rice maintains its ability to stick to itself while the cold hands prevent it from adhering to your skin. Meanwhile, the salt water adds that subtle, professional-quality seasoning to the exterior that distinguishes restaurant-quality onigiri from homemade versions.
I stumbled upon this technique during a neighborhood potluck when I noticed my Japanese neighbor's perfect rice balls and confessed my struggles. She laughed knowingly and shared this temperature trick that her grandmother had taught her. "The rice should be warm, the hands should be cold, and the heart should be patient," she told me. That advice transformed our homemade rice balls from frustrating to foolproof overnight.
Mother's Rice Ball Secret
My mother, who learned to make onigiri from her Japanese college roommate back in the 1980s, passed down the single most valuable trick for perfect salmon rice balls - one that transformed our family recipe from good to exceptional. While everyone focuses on the filling or the rice quality, Mom always said, "The magic is in your hands, not the ingredients." She taught me that controlling the temperature difference between the rice and your hands is what separates amateur attempts from professional results.
Her technique was almost ceremonial: keep the rice warm and comfortable to touch (not hot enough to burn, but warm enough to be pliable), then plunge your hands into ice water for 15-20 seconds before each new rice ball. Quick-dry them on a clean kitchen towel, dip fingertips lightly in salt water, and begin shaping immediately. The cool hands prevent the rice from sticking to your skin while allowing the grains to bond with each other. Meanwhile, the trace salt from the water subtly seasons the exterior for the perfect flavor balance.
I remember watching Mom make these as a child, fascinated by her methodical hand-cooling ritual that seemed like magic. She'd smile and say, "Patience makes perfect rice balls, rushing makes rice pudding." Years later, when I started cooking with Max, I found myself repeating her exact words as we cooled our hands in the designated "magic water bowl" before each shaping attempt.
FAQ
What's the difference between salmon rice balls and sushi?
Though similar in ingredients, salmon rice balls (onigiri) differ from sushi in several key ways. Onigiri uses plain salted rice rather than vinegared sushi rice, typically has fillings inside rather than on top, and serves as a portable meal rather than a delicacy. Think of onigiri as Japan's version of a sandwich - everyday comfort food designed to be carried and eaten by hand.
Can I use leftover rice for salmon rice balls?
Absolutely! Day-old refrigerated rice often works better than fresh rice for salmon rice balls. The slightly dried texture actually helps the grains stick together while maintaining their structure. Just warm it slightly in the microwave (covered with a damp paper towel) until it reaches room temperature before shaping, and you'll find it forms perfectly.
Are salmon rice balls healthy?
These rice balls offer a balanced nutritional profile with protein from salmon (rich in omega-3 fatty acids), complex carbohydrates from rice, and minerals from nori seaweed. They're portion-controlled by nature and can be made healthier by using brown rice or adding vegetables to the filling. Homemade versions allow you to control sodium levels and avoid the preservatives found in store-bought varieties.
How do you eat salmon rice balls?
Traditionally, salmon rice balls are eaten by hand - the nori wrapper provides a convenient, non-sticky handle. Simply hold the rice ball by the nori portion and enjoy! No special utensils or sauces needed, though some people enjoy dipping them in additional soy sauce or serving with a side of pickled vegetables for contrast.
A Taste of Japan in Your Lunchbox!
Now you have all the secrets to creating perfect salmon rice balls - from proper rice preparation to my mother's special temperature technique. These portable little packages prove that homemade lunches can be both nutritious and exciting, turning ordinary weekday meals into something special. The joy on Max's face when he opens his lunchbox to find these carefully crafted rice triangles reminds me that food made with love truly tastes better.
Looking for more quick meals that wow? Try our 10-Minute Easy Garlic Cheese Rolls that pair perfectly with soups and salads. Need a dinner that impresses without the stress? Our Easy Chicken Cordon Bleu Recipe simplifies the classic for busy weeknights. Craving something with a kick? Our Easy Cajun Sausage and Rice Skillet delivers big flavor in just one pan!
Share your rice ball creations! We love seeing your family's culinary adventures!
Rate this recipe and join our cooking community!
Related
Looking for other recipes like this? Try these:


Pairing
These are my favorite dishes to serve with Salmon Rice Balls


salmon rice balls
Equipment
- Rice cooker/pot (For cooking short-grain rice)
- Rice paddle (Avoid using a metal spoon)
- Small bowl (For salt water (hand dipping))
- Plastic wrap (Optional-helps shape and store rice balls)
- Sharp knife (For cutting nori sheets)
Ingredients
Rice Base:
- 2 cups Short-grain rice - Japanese-style ,rinsed well
- 2.5 tablespoon Rice vinegar
- 1 tablespoon Sugar
- 1 teaspoon Salt
- 1 tablespoon Sesame seeds - Optional ,for mixing or garnish
Salmon Filling:
- 1 cup Salmon - Fresh ,leftover, or canned
- 2 tablespoon Mayonnaise - Use Japanese mayo if available
- 1 teaspoon Soy sauce
- 1 tablespoon Green onions - Finely chopped
- 1 teaspoon Sriracha - Optional ,to taste
Wrapping:
- 3 sheets Nori - Cut into thirds
- 1 tablespoon Sesame seeds - Optional ,to roll exterior if unwrapped
Instructions
- Cook the rice according to package directions in a rice cooker or pot.
- Mix rice vinegar, sugar, and salt until dissolved.
- Cool rice slightly, mix with vinegar seasoning, and rest covered.
- Flake the salmon into small pieces using a fork.
- Combine salmon with mayonnaise, soy sauce, green onions, and sriracha.
- Prepare salt water, rinse hands in cold water before shaping.
- Scoop ⅓ cup of rice and flatten in your palm.
- Add salmon filling and fold rice around it.


Leave a Reply